In this tutorial, we’ll take a look at some Mailchimp audience management strategies and organisational tools like tags, groups, and segments. The focus will be on understanding the differences between them and when and why you should use each of them.
Intro #
The best online marketing campaigns have one thing in common: they deliver the right message to the right person at the right time. To do this, you need an in-depth understanding of the audience you’re speaking to.
“ Knowing who your audience is and which messages resonate best with them is critical to successful online marketing. ”
This is why Mailchimp provides audience management tools like Tags, Groups and Segments. Using these tools will help you to organise and target your audience more effectively.
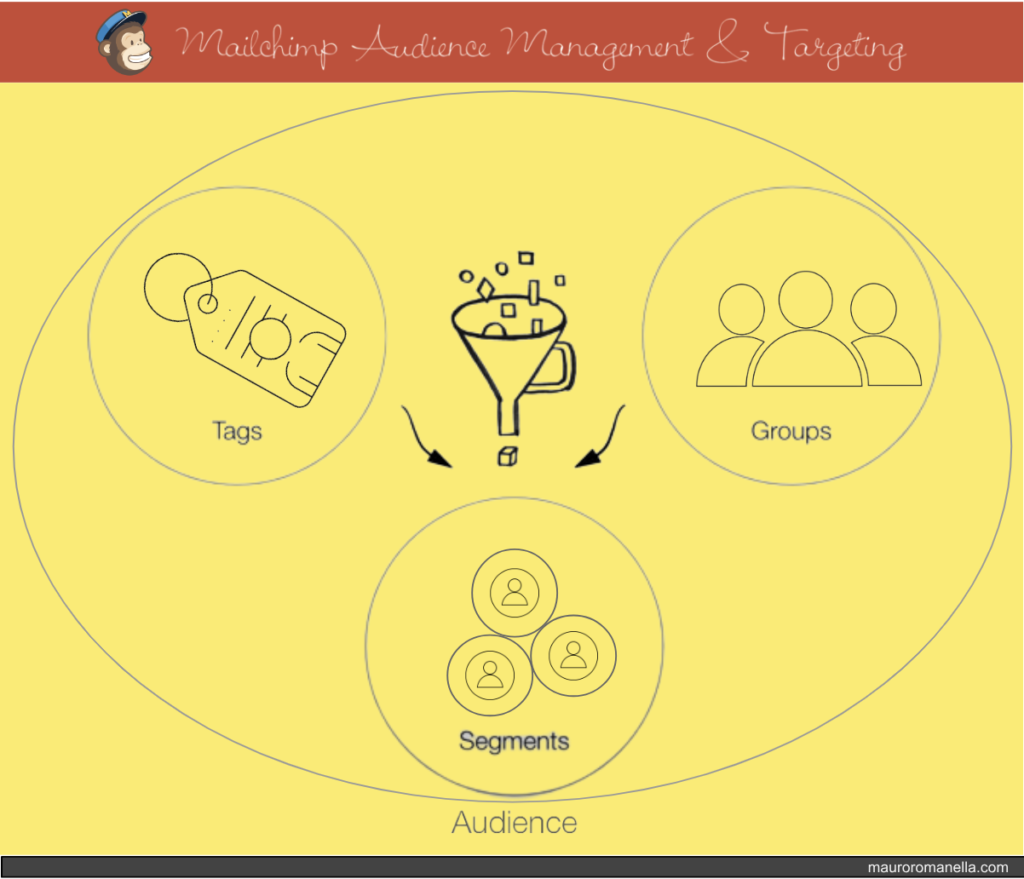
Let’s kick off this tutorial with some audience management concepts.
“ Good audience management is the foundation of marketing. ”
Mailchimp Audience Management #
Your audience in Mailchimp serves as a repository for all your contacts data.
As your business grows, the volume of customer data that needs to be managed also increases.
And that’s where audience management comes in.
“ Just because your business is growing doesn’t mean you need to create new audiences. ”
To simplify your contact management and enhance your targeting capabilities Mailchimp encourages the “fewer audiences, more targeting” approach:
“ Before you create a new audience it’s a good idea to stop and ask yourself if organisational tools like tags, groups or segments could get the job done. ”
So, Mailchimp tends to recommend sticking to one audience if possible.
The reason is simple: managing one audience is easier than managing multiple audiences.
It’s essential to understand that Mailchimp audiences are independent of one another, even if they’re in the same account. This means that audiences don’t share contact data or campaign statistics.
“ Separate audiences do not share data ”
So, keeping contact data as consolidated as possible makes it simpler to get a holistic view of your audience, makes it easier to use flexible tools like tags, groups and segments to target messages based on insights, makes it simpler to track the impact of your campaigns over time across all of your contacts, and ultimately reduces your bill (because if you have the same contact in 3 audiences, they’ll be counted three times towards your billing).
“ Contacts across audiences count multiple times ”
In short, the best practice is maintaining a single audience and using tags, groups and segments to organise your contacts.
However, there is one exception to this recommendation, which is when you need to communicate with distinctly different audiences within the same Mailchimp account.
“[ One audience] except if you interact with two distinctly separate audiences. ”
One of the most common scenarios for this is when you have both wholesale and retail customers. The contacts in these audiences will likely never interact with each other and require entirely different sets of content and customer journeys.
In cases such as these, where communicating with different audiences in the same manner might not be ideal (or where mixing messages could be problematic), it’s beneficial to have separate audiences. This ensures distinct content, analysis, and insights for each group of people.
However, as previously mentioned, in many cases, using tools like tags and segments to target within one audience is the best—and easiest—option.

Let’s now jump into the differences between the Mailchimp audience management tools: tags, groups and segments.
Tags #
Apply a tag to a contact
What is … #
Tags are simple labels that you create and assign to your contacts.
They allow you to add more information to your contact data that you wouldn’t necessarily collect from your audience when they sign up for your newsletters.
“ Tags are flexible, customizable and allow you to easily track contact based on characteristics you learn about them. ”
How to use … #
In Mailchimp, tags can be assigned to contacts either manually or automatically based on specific criteria or triggers.
So think about it this way: There will always be things about your contacts that Mailchimp just doesn’t know.
For example, Mailchimp can track a contact and how it interacts with your campaigns. Like if someone opens and clicks a link in your email or if someone makes a purchase from your connected e-commerce store.
However, there are a lot of things that you learn about your audience outside of mailchimp, too. Like if you meet a fan of your brand in person or a customer reaches out to you on social media looking for help.

- Manual Tagging:
Manual tagging is a good option when you need to tag contacts based on information that is not available in Mailchimp.
For example, suppose you have a physical store and you collect email addresses at the point of sale. You could manually tag these contacts as “In-Store Contacts” in your Mailchimp audience to differentiate them from online customers.
This way, you could send a targeted follow-up email introducing your online boutique.
- Automatic Tagging:
Automatic tagging is a good option when you want to tag contacts based on their actions or data within Mailchimp.
For example, if you have a signup form on your website where visitors can subscribe to your newsletter, you could set up an automation rule in Mailchimp to automatically tag these new contacts as “Newsletter Subscribers” when they are added to your audience.
This way you avoid sending emails to people who have not subscribed.
Things to know … #
Tags are designed for internal audience organisation.
Using multiple tags, make much easier to keep one main audience. For example, instead of creating a separate audience just for an event, you can add a tag to the profiles of all contacts who have registered for the event. You can then use this tag to send them emails about the event, such as reminders, updates, and post-event surveys.
Tags you’ve added to contacts display on the overall contact table.
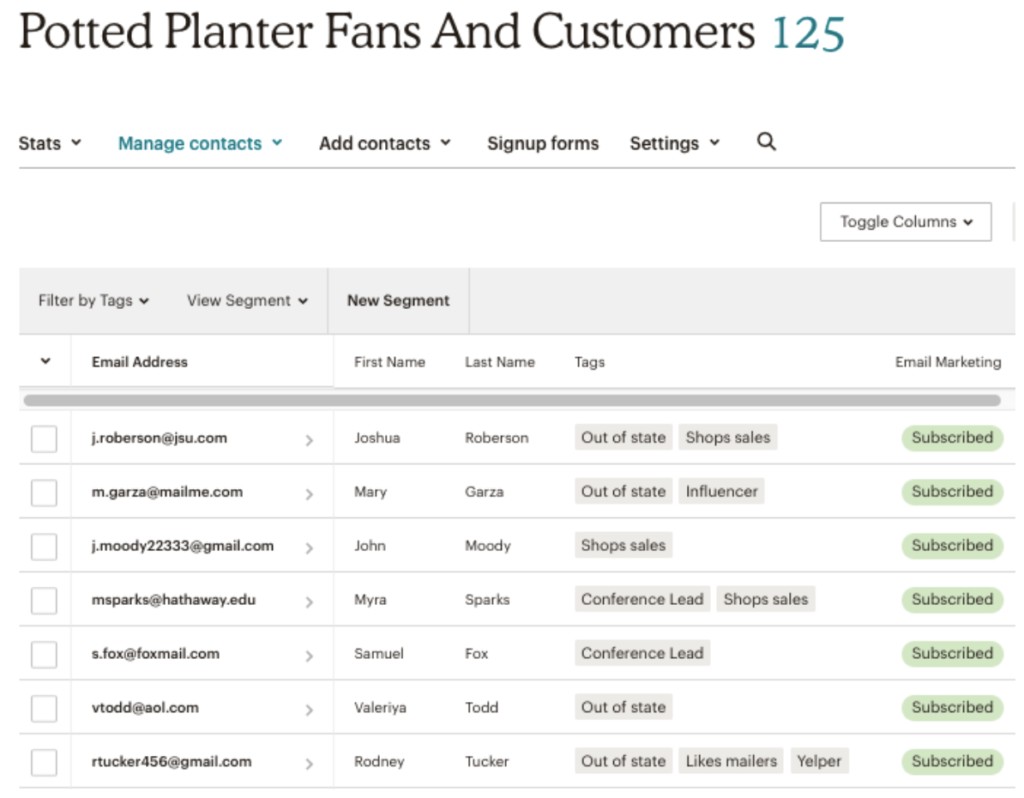
Now,
You can filter your contact table by tags.
You can send emails directly to tags in your audience.
You can use tag data to build segments and further target your contacts (more on the segments paragraph).
Groups #
Organise subscribers into groups
What is … #
Groups are categories that you create and your contacts assign themself to.
Like tags, groups add more information to your contact data; however, unlike tags, you collect this information directly from your audience when they subscribe to your marketing.
Very broadly, think of tags as completely internal to your Mailchimp account, meaning customers will never see these tags you applied to their audience information, while groups are customer facing preferences that they can select upon sign up or when completing preference forms.
How to use … #
Groups are typically created through a form field that people fill out when they subscribe to your marketing.
Below, you can see a form example where we’re asking our customers to let us know their level of experience: beginner, intermediate or advanced.
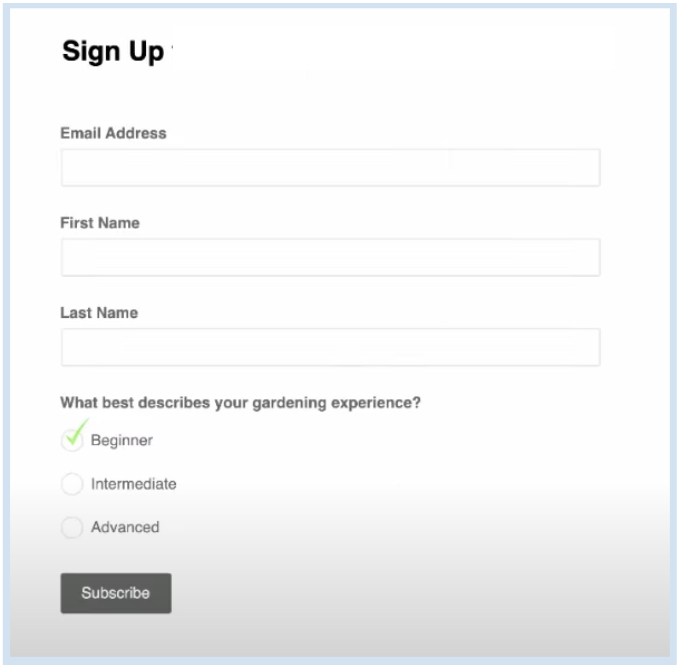
Once we get this information from our subscribers, we can then send different information to beginners versus experienced.

Groups can also be created within your audience dashboard.
This is handy if you need to manually add or import contacts to groups, or if you wish to create groups based on criteria that are not available in your signup form.
However they work best if, during the sign-up process, you allow your subscribed contacts to choose the groups that they wish to belong to.
As seen before, for internal audience organisation, consider using tags instead.
When you create a group and a contact doesn’t choose a specific option, respect their choice. If a subscriber hasn’t selected an option, they shouldn’t receive emails related to it.
“ Treat groups like a contract with your subscribers ”
Essentially, groups let your subscribers choose what content they want to receive from you. If you are not ready to target your emails by the groups you put out there, don’t put them out there.
It’s crucial to ensure that your groups and their respective options represent distinct categories of content. If there’s an overlap, it complicates the decision-making process regarding which contacts include or exclude in communications.
“ make sure your groups and the options within are unique silos of content ”
Sending content they didn’t opt for can increase the likelihood of them unsubscribing.
Things to know … #
Groups (same as tags) are displayed on the overall contact table in Mailchimp.
Now,
You can filter your contact table by group.
You can send emails directly to group in your audience.
You can use group data to build segments and further target your contacts (more on the segments paragraph).
So, at this point, once I have contacts organised in the tags and groups, how do I send just those people targeted emails?
That’s exactly where segments come into play.
Segments #
Customise your targeting with segments
What is … #
Segments are a way to filter your audience based on specific criteria.
Unlike tags or groups, you’re not adding any new data to your audience with segments. Instead, you’re simply using the data you already have to categorise your contacts.
Then, once you’ve segmented your contacts, you can send those people specific marketing content.
The visualisation below should elucidate the point:
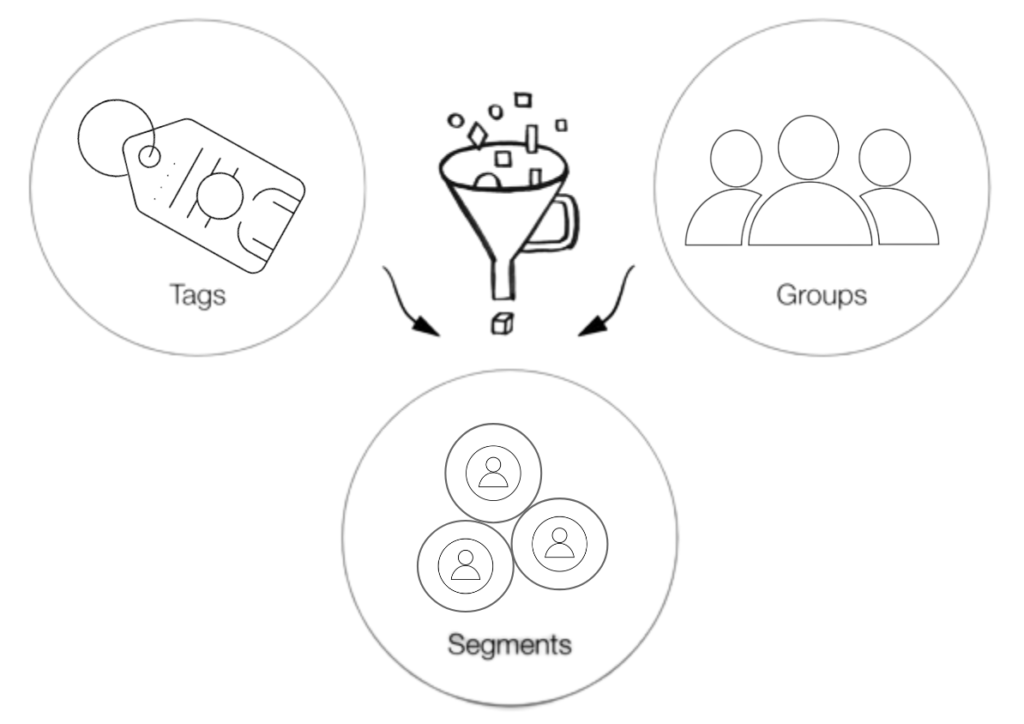
- Tags and groups are characteristics of our audience contacts.
- Tags: are labels created based on what we know about our audience.
- Groups: are things that our audience told us about themselves.
How to use … #
You can create a super simple segment. For example, you could create a segment of all subscribers who:
Have tag “clients” applied
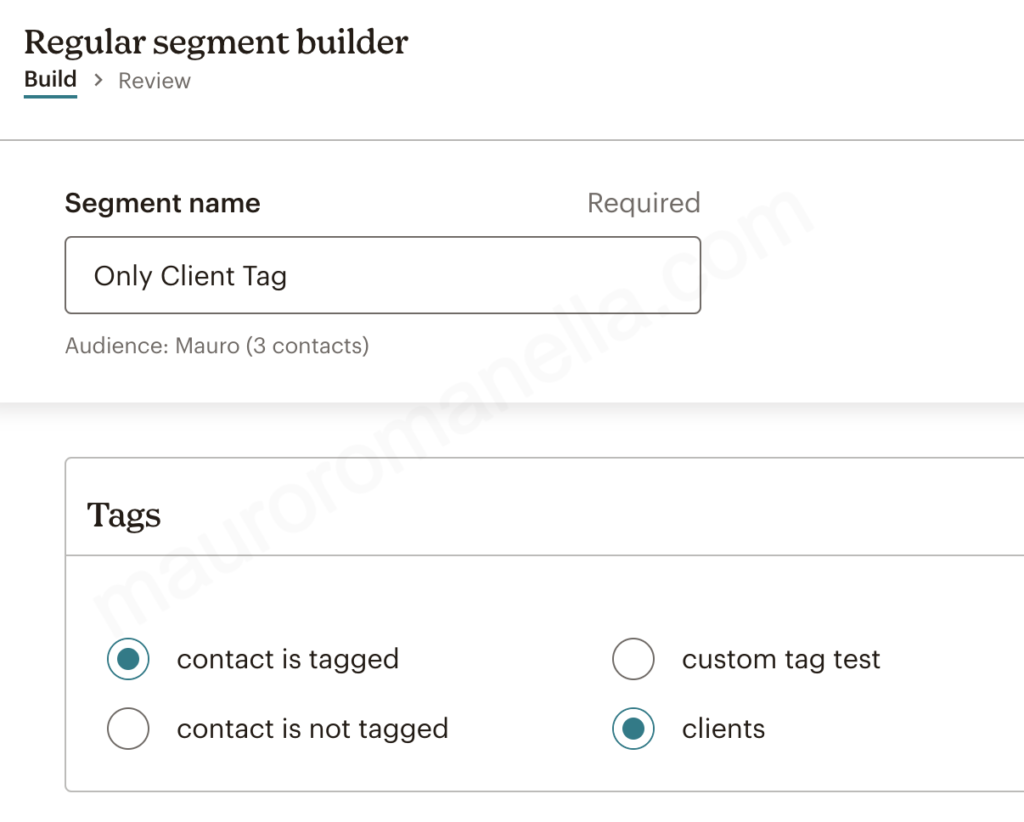
You can also create segments based on groups, or a combination of both. For example, you could create a segment of all subscribers who:
Have the tag “clients” and are in the group “fashion”
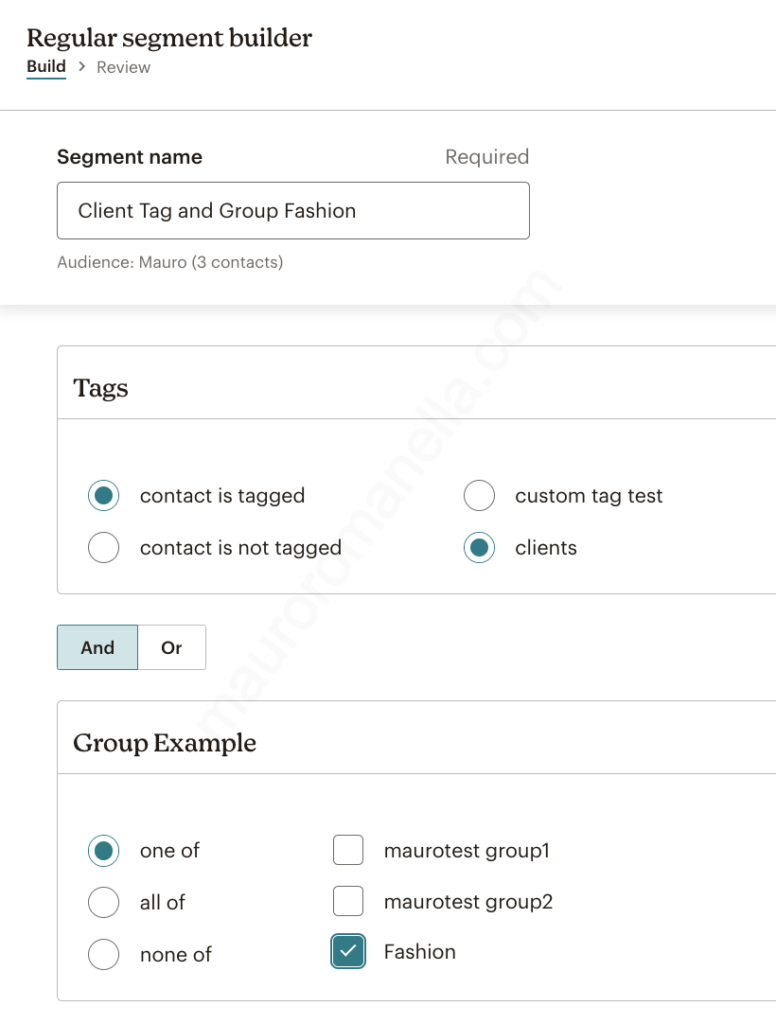
Of course, with segments, it’s not just about filters by groups and tags.
A segment can be created from any of the information you collect in your audience (or automatically collected by Mailchimp). This gives you a lot of flexibility in how you segment your audience.
You can create segments based on audience activity. For example, you could create a segment of all subscribers who:
Have not opened your last two emails.
Have not purchased from you in the last six months.
Have abandoned their cart on your website.
In addition to audience activity, segments can also pull in demographic, behavioural and purchase activity. For example, you could create a segment of all subscribers who:
Have opened a certain campaign and have spent more than $100.

Here the list of the segmentation options.
Mailchimp, also, offers a selection of pre-built segments based on campaign activity, purchase history, and other valuable information.
Things to know … #
Keep in mind that segments can have up to five of these characteristics or criteria.
What’s great about segments is that regardless of the criteria you choose, segments are dynamic and they update automatically with the latest audience data.
