In the tutorial, we will take a look at creating and installing the Facebook pixel base code on your website.
Note: In January 2022, after turning the Facebook company into Meta, the company changed the Pixel name to “Meta pixel”.
Anytime we’re sending anyone off of Facebook so we’re sending them to a website or we’re sending them anywhere online that’s not on Facebook we need the Facebook pixel in order to track anything
The Facebook Pixel is a piece of tracking code that sits on your website and delivers information about your customers straight to Facebook.
It relies on Facebook Cookies, which enable Facebook to match your website visitors to their respective Facebook user accounts.
Pro Tip: Keep in mind that the pixel can’t work retrospectively. So, even if you’re not running Facebook ads yet, you should install the Meta pixel on your website. This way, Pixel will start collecting data on your website visitors right away, so you won’t have to start from scratch when launching your very first Facebook ads.
Reference #
- How to set up and install a Meta pixel – By Facebook: link
- How to Install Meta Pixel with GTM – By Analytics Mania: link
- Meta Facebook Pixel Tracking with GTM – MeasureSchool (Video): link
Get Facebook Pixel tracking code #
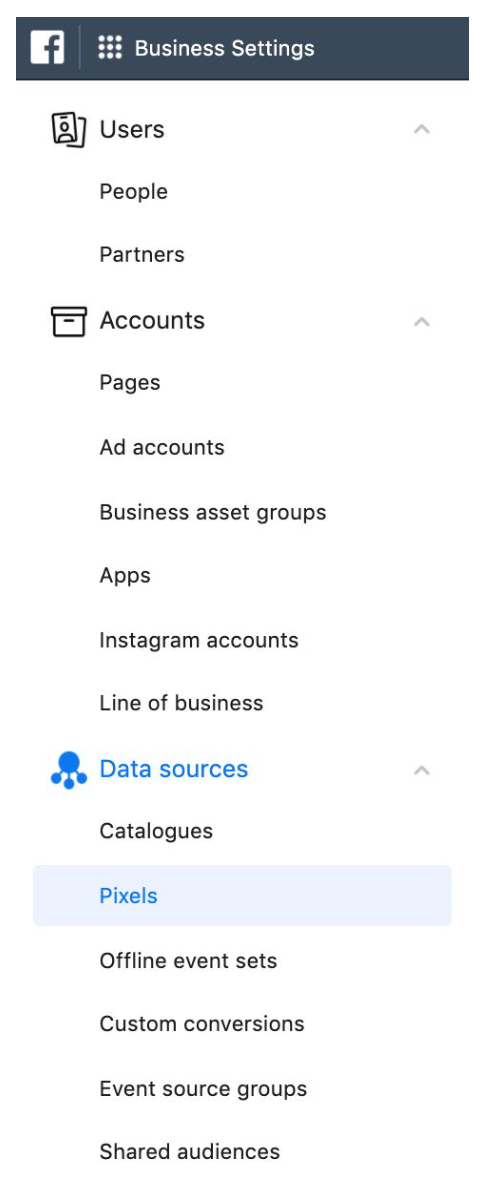
Navigate to your Business Managers’ settings and click on Data Sources, pixels.
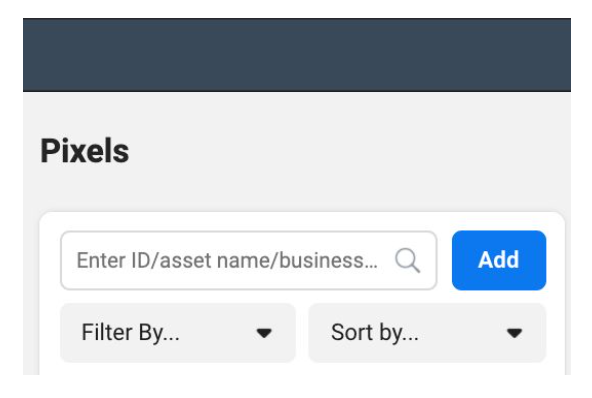
When this panel is open you will be able to click the Add button. From here you will be able to create a new pixel.
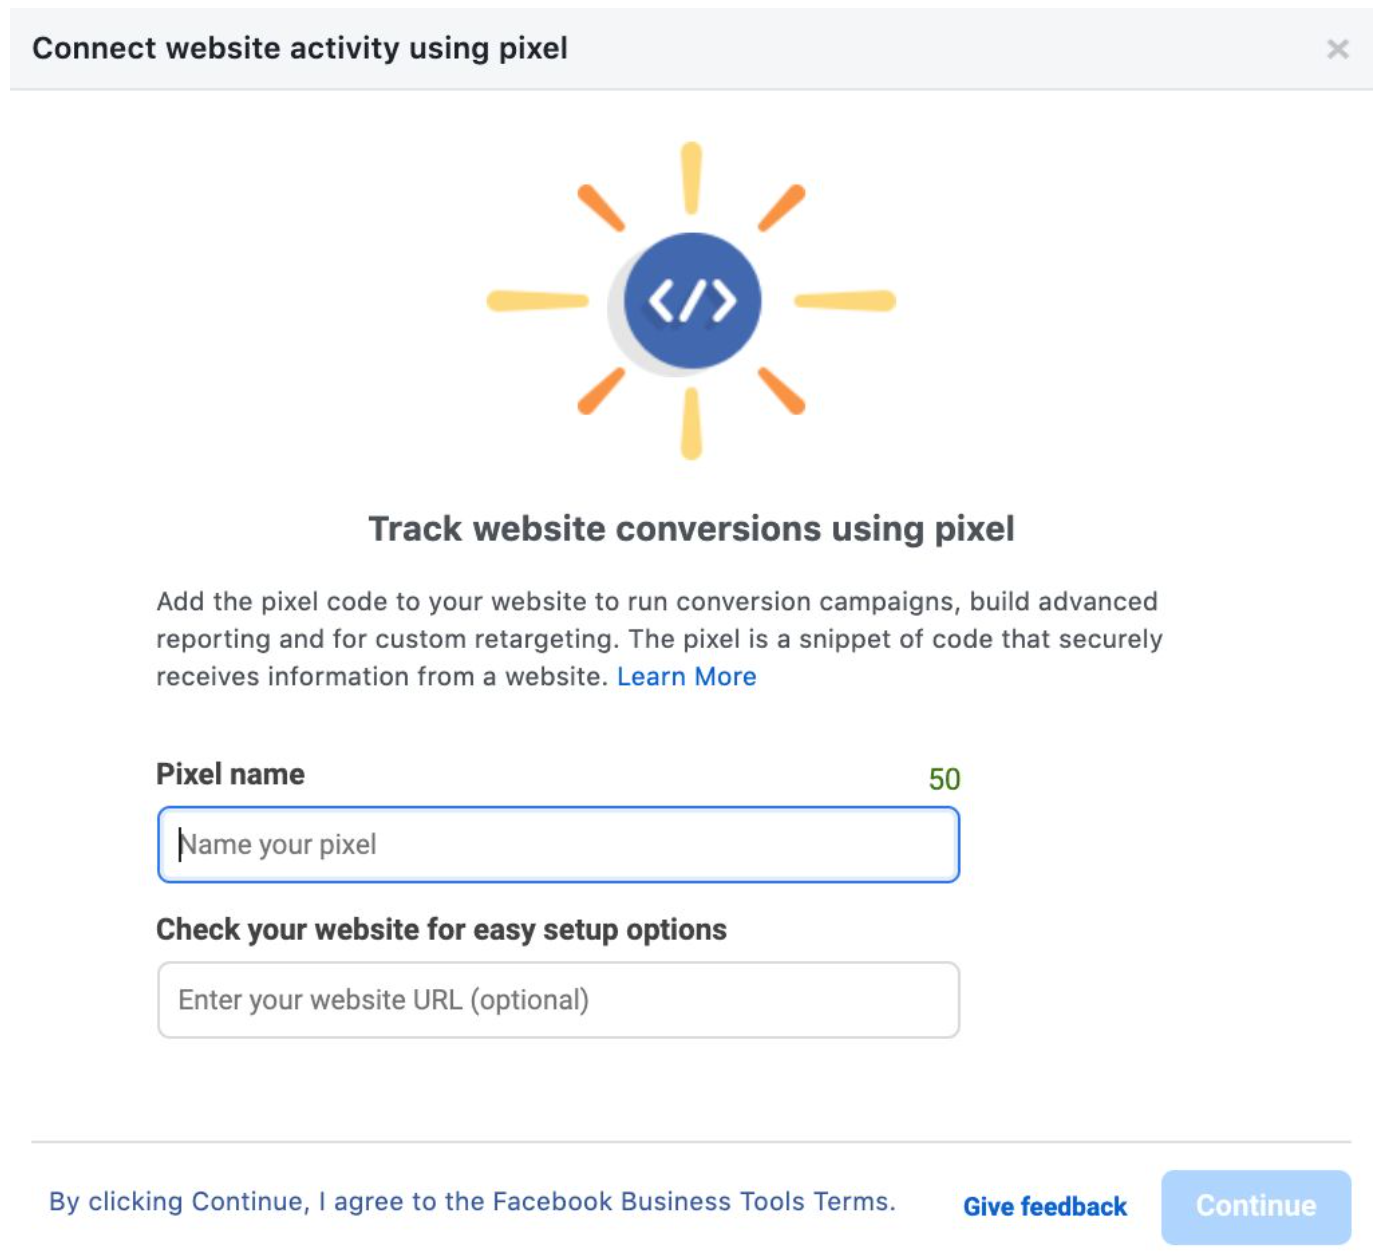
Once you have clicked on the Add button you will see a window that will start the process. Give the pixel the name (Company Name _ Pixel) and enter your website URL.
The next step from here looks like this:
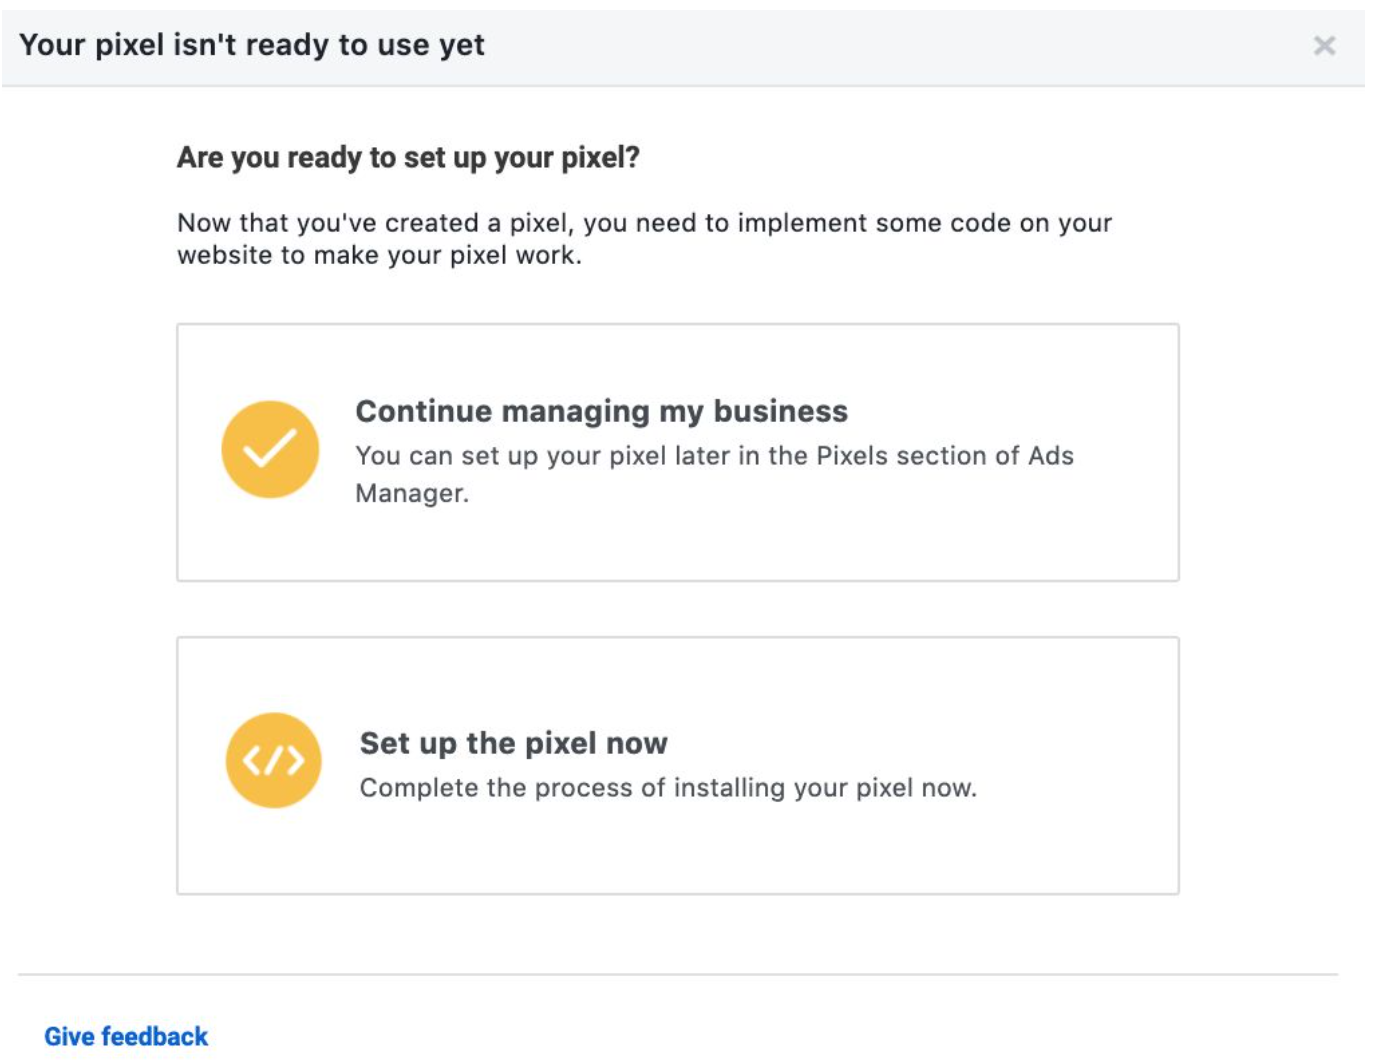
Choose Setup the pixel now.
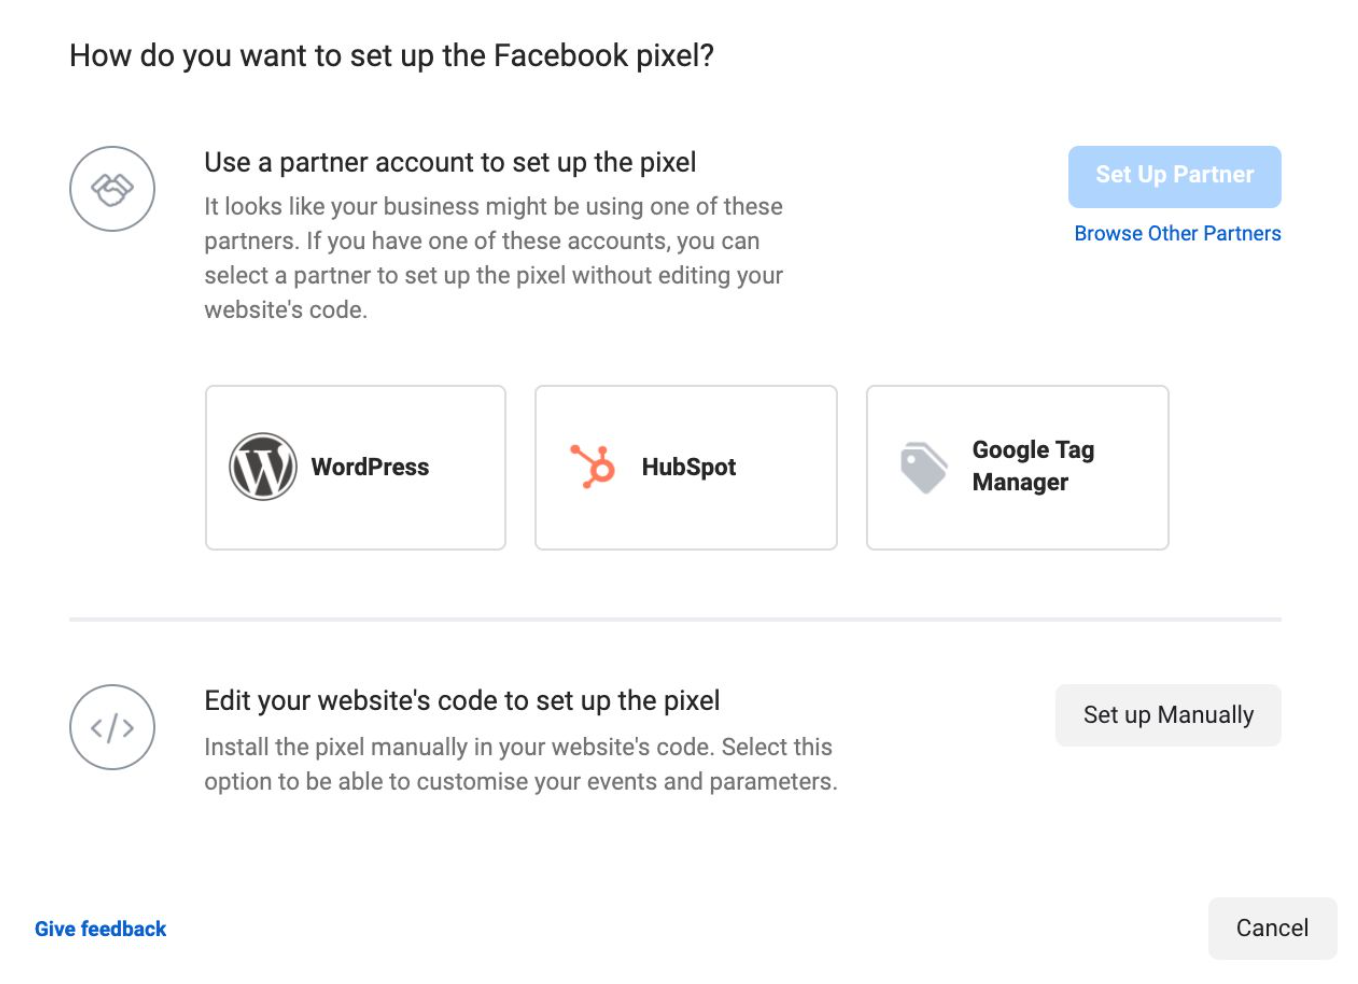
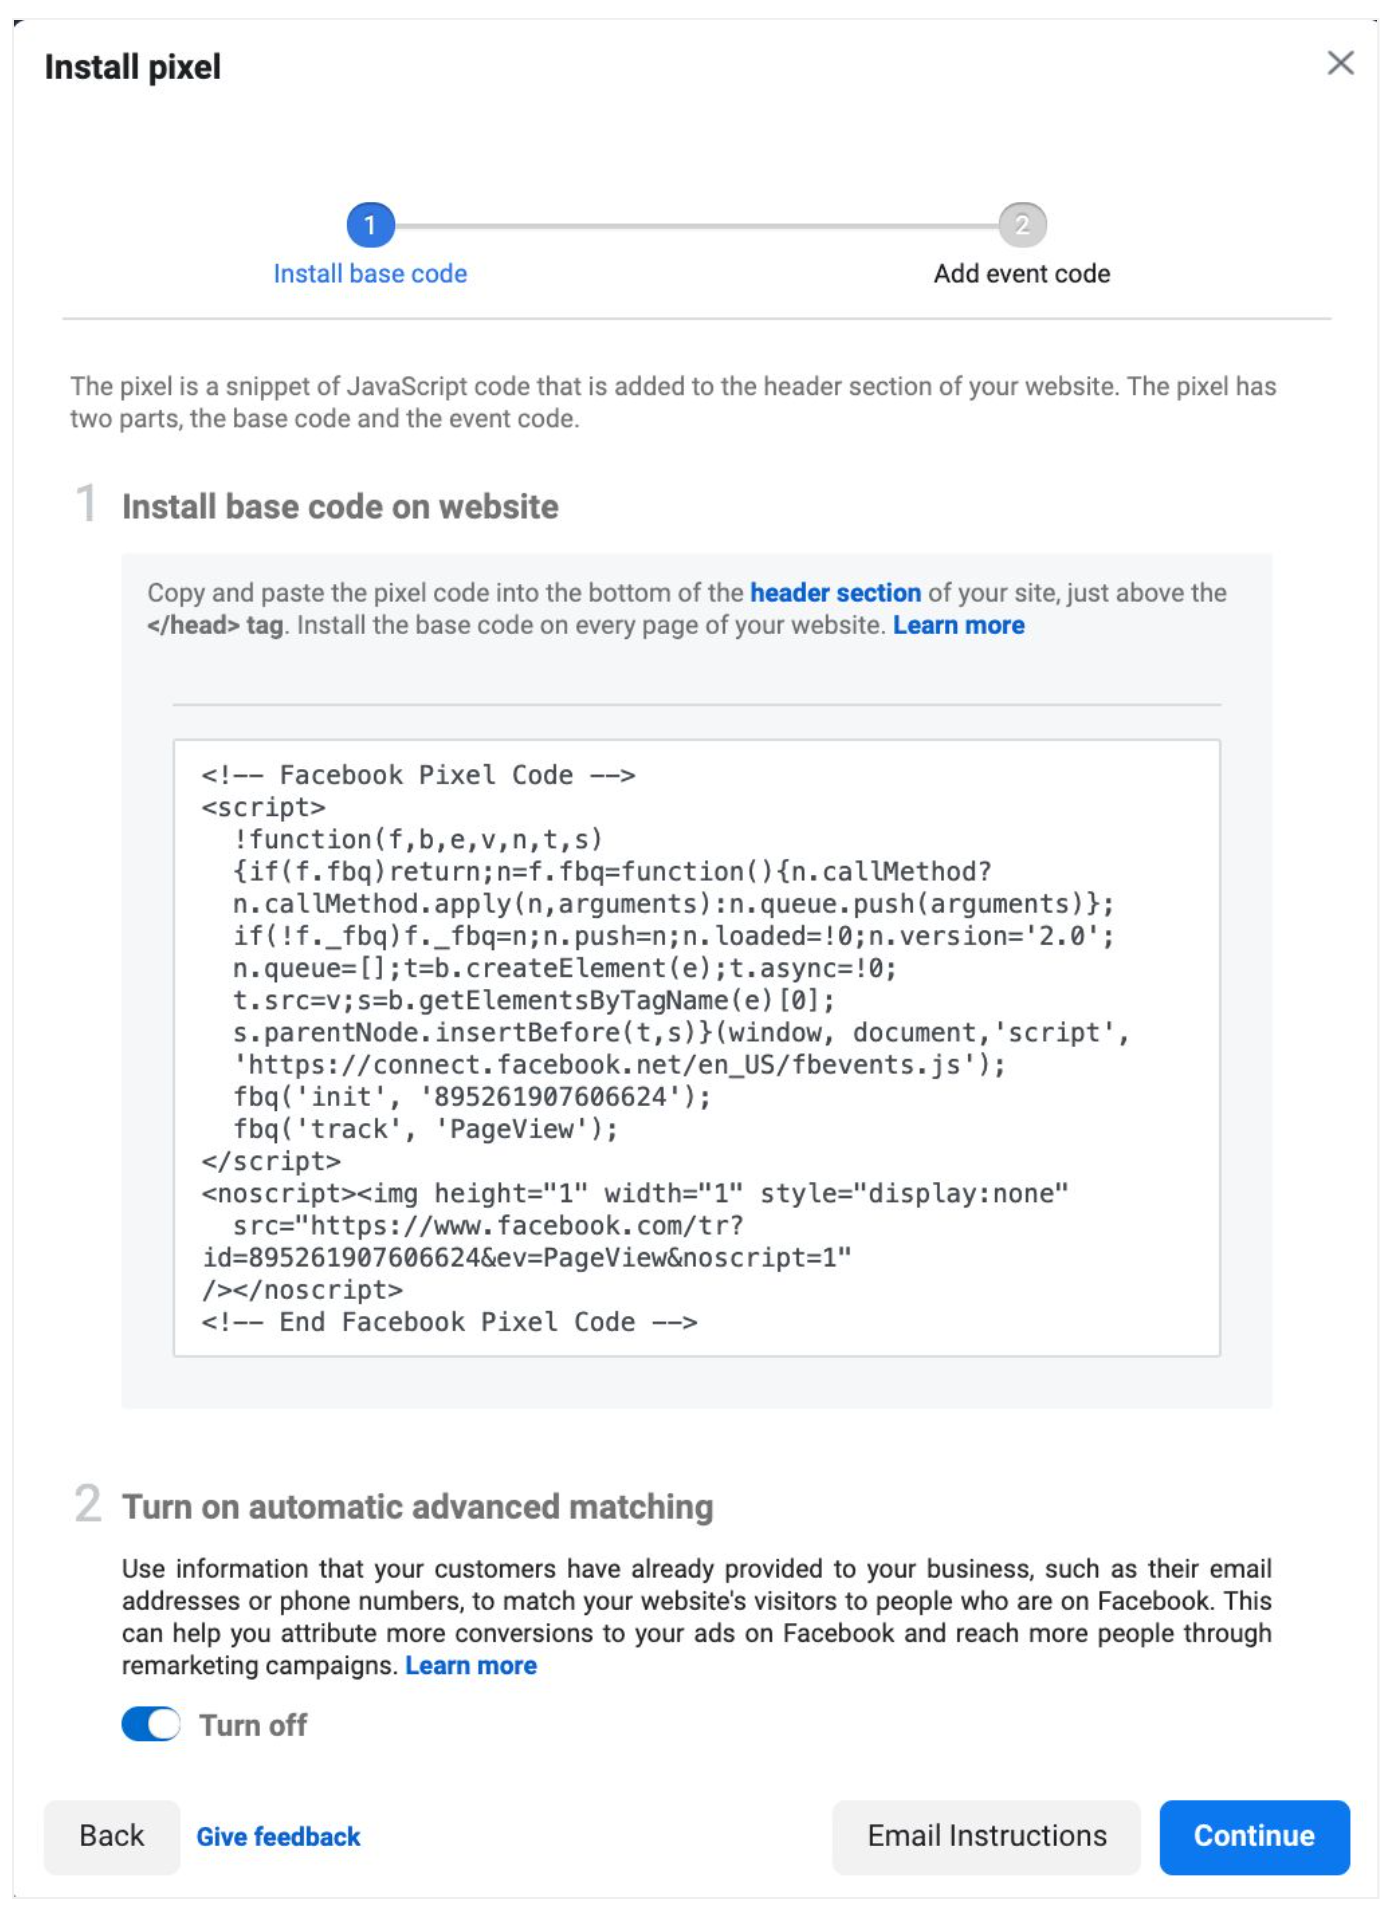
Choose Setup Manually. From here Facebook will open the pixel installer window which includes the code you need to add to your website.
Install the Facebook Pixel with GTM #
Create a new Tag and select from the community template gallery “Facebook Pixel by facebookarchive”
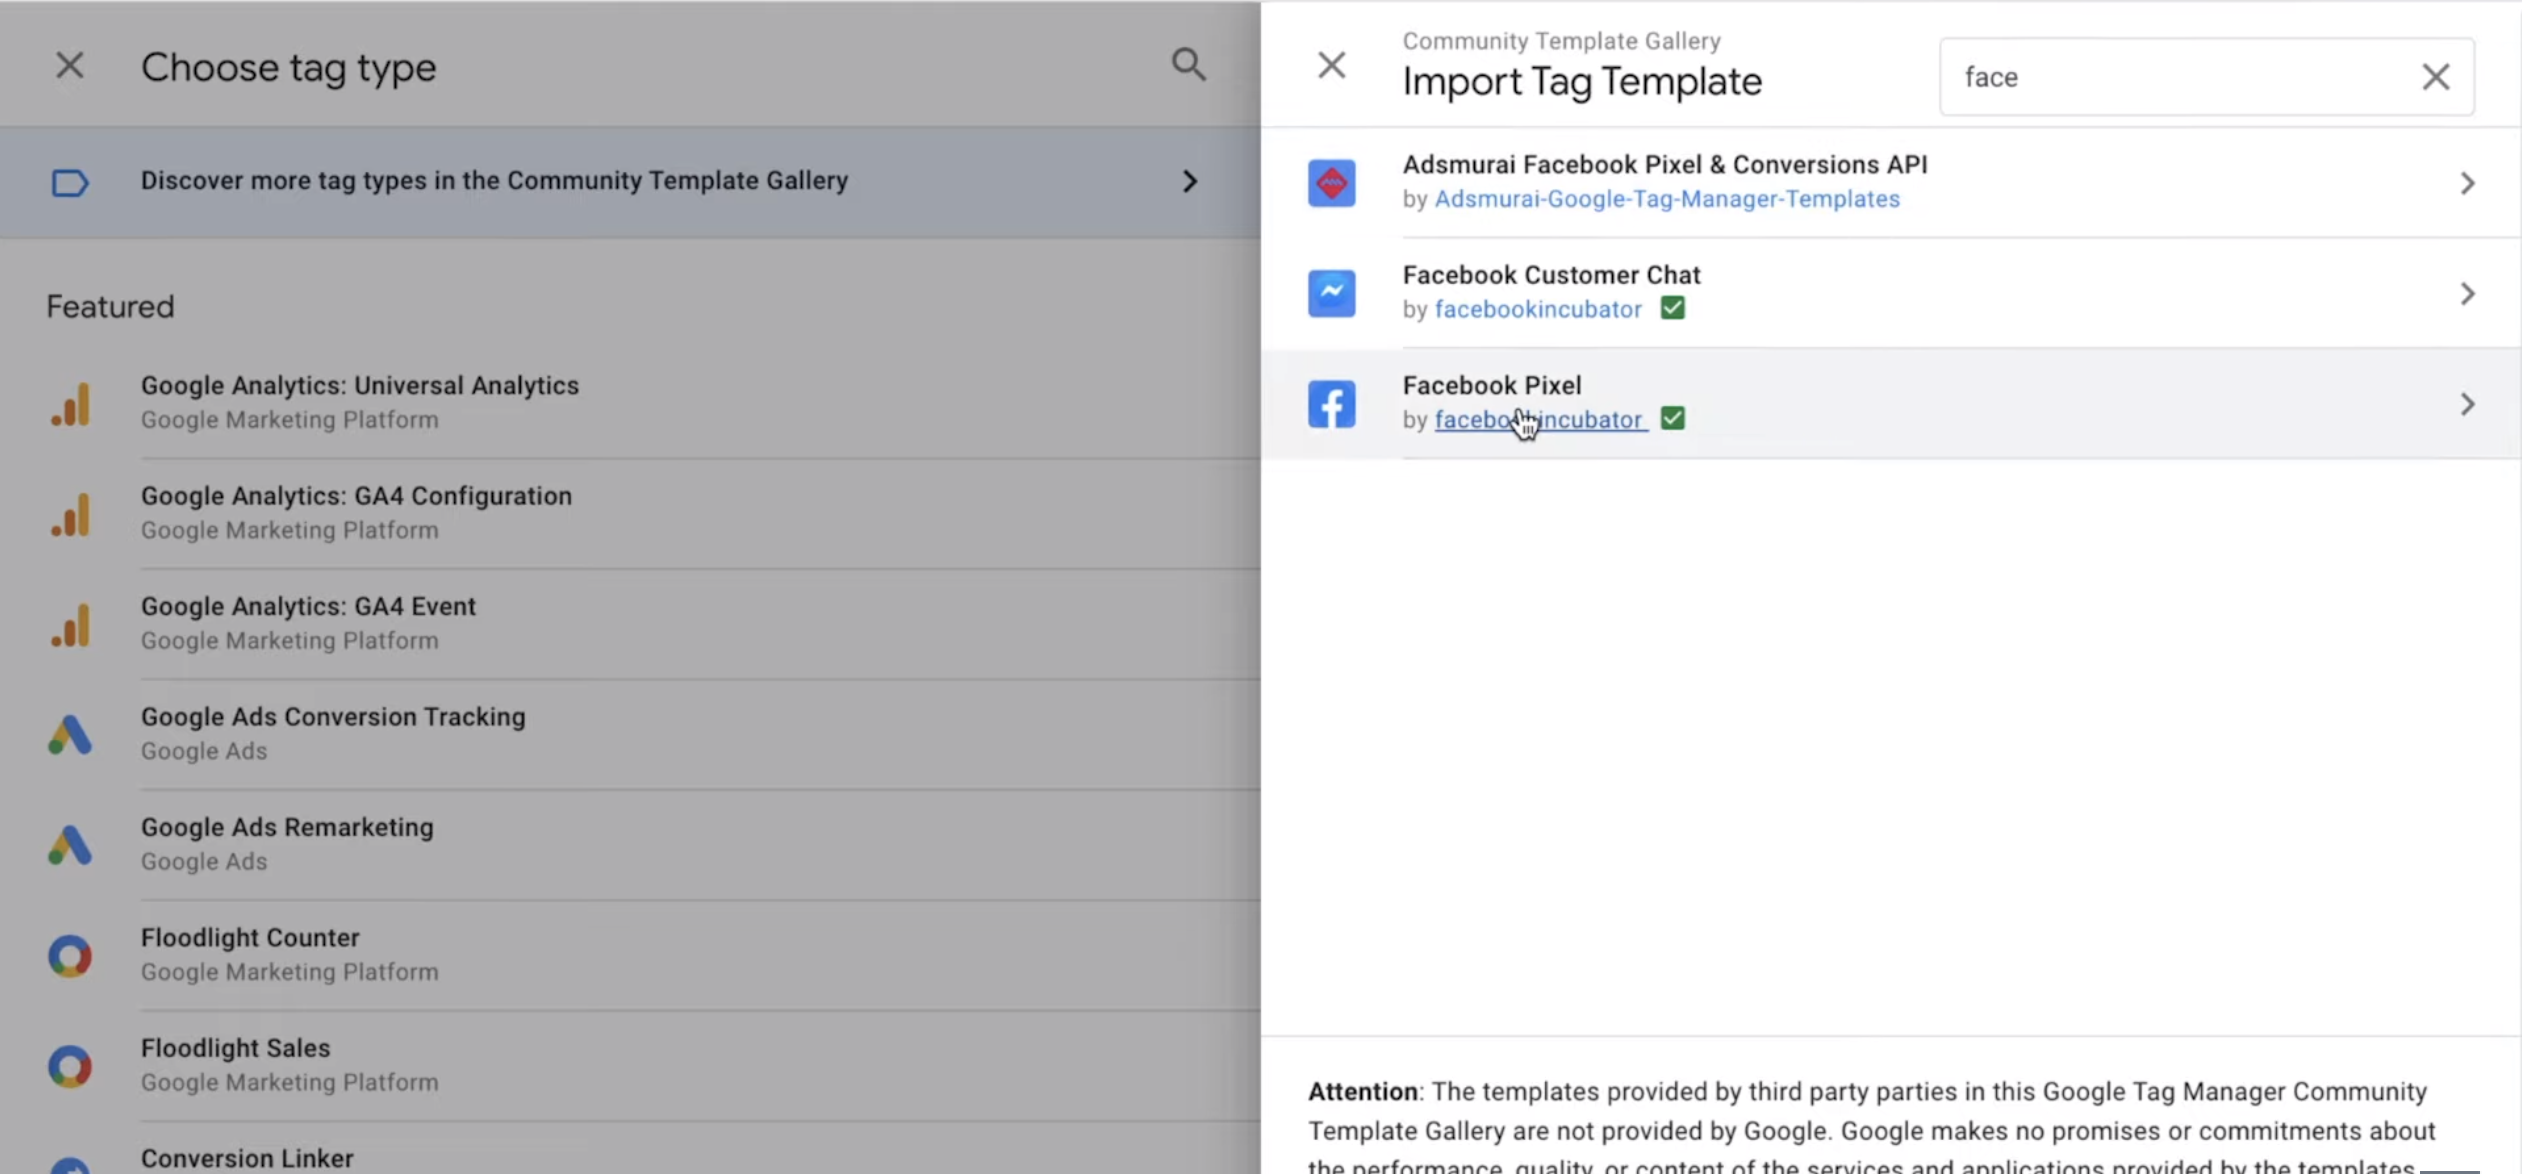
Note: Simo Ahava has created this Custom Template and shared it with everyone, later this template was acquired by Facebook (facebookarchive).
In the Facebook Pixel ID(s) field, insert your Pixel ID
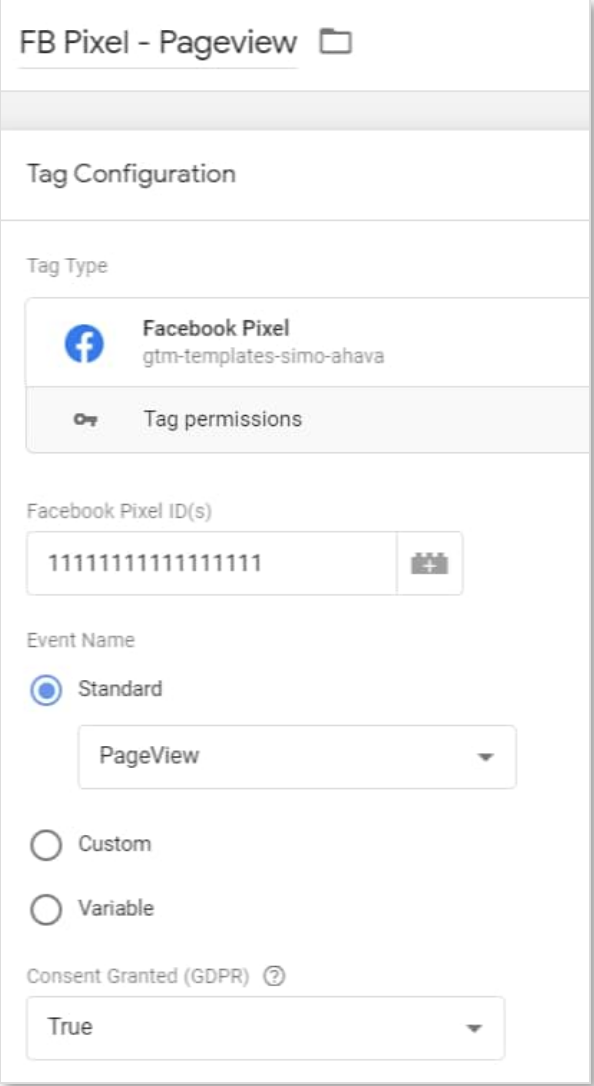
Pro Tip: Create a GTM variable that contains your FB Pixel ID
Set the tag to fire on “All Pages”.
That’s all.
Test if the Facebook Pixel is Working #
Facebook Pixel Helper Extension
The Facebook Pixel Helper is a Google Chrome extension you can use that will tell you if the Pixel is installed properly. It will show you which events are firing on a specific page and if there are any errors you might need to look into.
Here is what it looks like when installed:

Facebook Pixel Test Event Tool
- Go to Events Manager.
- Select your pixel or app in the Data sources tab.
Click Test events. Activity is only recorded while the Test events web page is kept open.
If you’re testing app events, open your app on your phone. For website events, find the Test browser events section, enter your website URL and click Open website. This opens your website in a separate window or tab.
Interact with your app or website to test the events you’ve already set up. Your interactions will appear in the Test events tab within 30 seconds.


What’s Next #
Meta Pixel events
Meta Pixel audience creation
Meta Pixel performance measurement
Meta pixel optimisation

Appreciate you sharing, great post.Really looking forward to read more. Really Great.
Say, you got a nice article post.Really looking forward to read more. Cool.
Thank you ever so for you blog post.Really looking forward to read more. Want more.
Really enjoyed this blog article.Thanks Again. Really Cool.
Muchos Gracias for your post.Thanks Again.
Say, you got a nice blog article.
A big thank you for your article.Much thanks again. Fantastic.
I truly appreciate this blog.Really looking forward to read more. Fantastic.
Fantastic blog post.Really looking forward to read more.
Wow, great post.Really looking forward to read more. Keep writing.
Thanks again for the article post.Much thanks again. Cool.
Very informative article post.Really thank you! Fantastic.
Really appreciate you sharing this article post.Much thanks again. Cool.
Thanks again for the blog article. Really looking forward to read more. Awesome.