In the tutorial, we will take a look at adding pages to Business Manager.
Business Manager helps you manage your ad accounts, Pages, apps, and permissions, all in one place.
Before you begin #
Before you set up Business Manager, it’s important to identify the primary Business Manager admin.
Ideally, the person who will be the primary Business Manager admin should complete this set up, although it’s not required.
In order to create and manage the account, the primary Business Manager admin needs access to:
- Your company’s Facebook Page, in an admin role.
- Ad account ID numbers to associate with the Business Manager account.
- Email addresses for the employees, co-workers, and partners who need to be assigned roles on the account.
Create a Business Manager Profile #
When you are ready click here and choose to create an account.
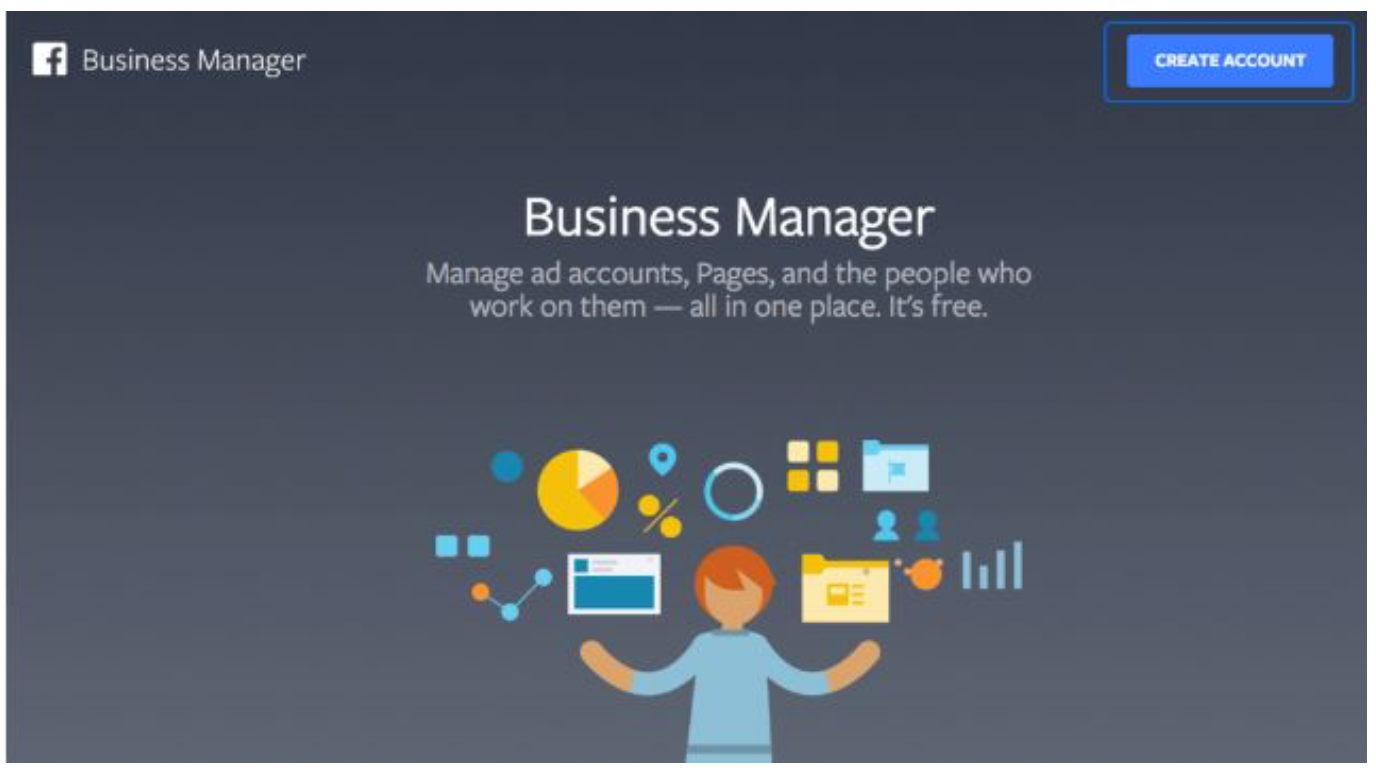
- Enter your business name and click Continue.
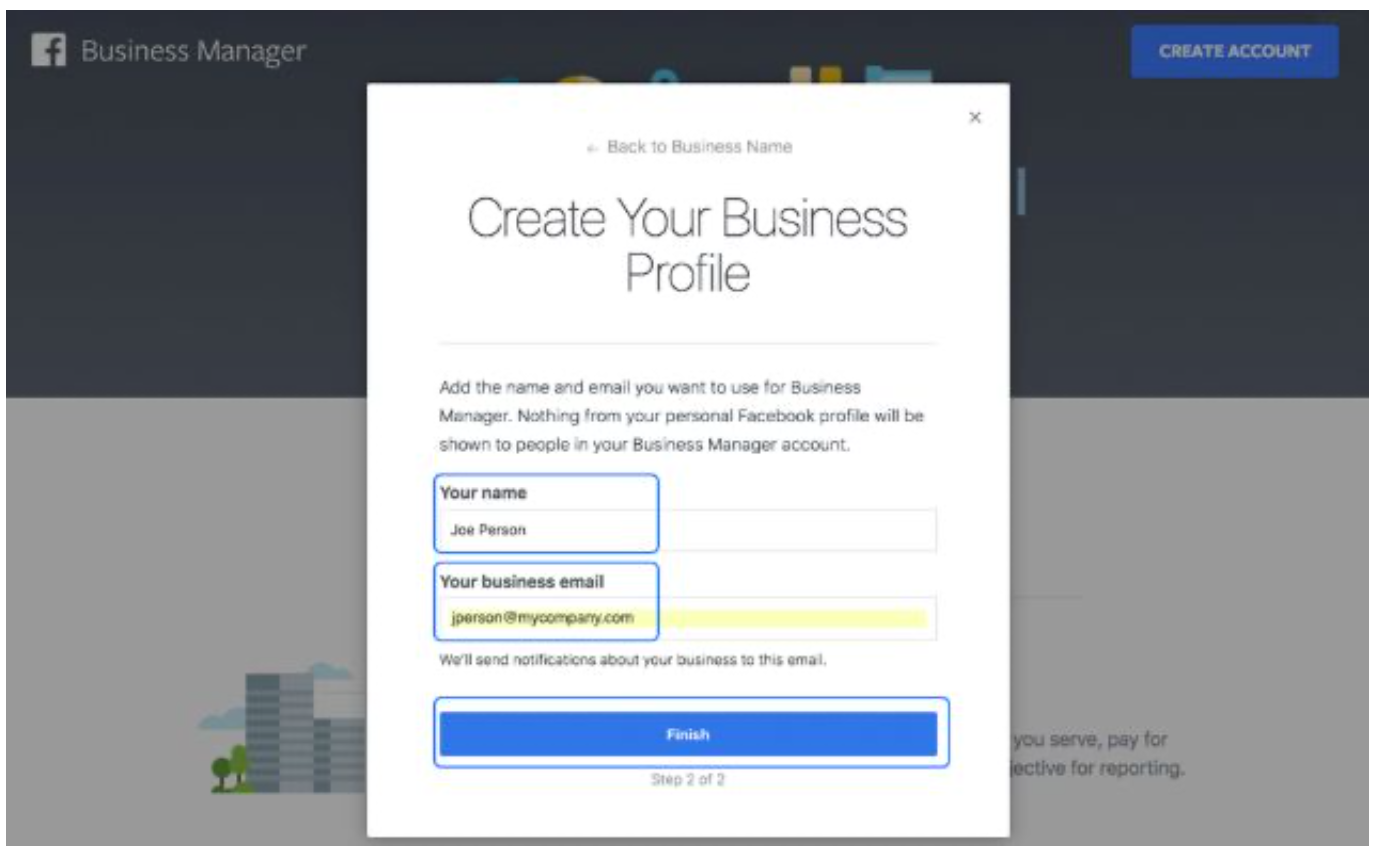
- Enter your name and email (or those of the primary Business Manager admin).
- Click Finish
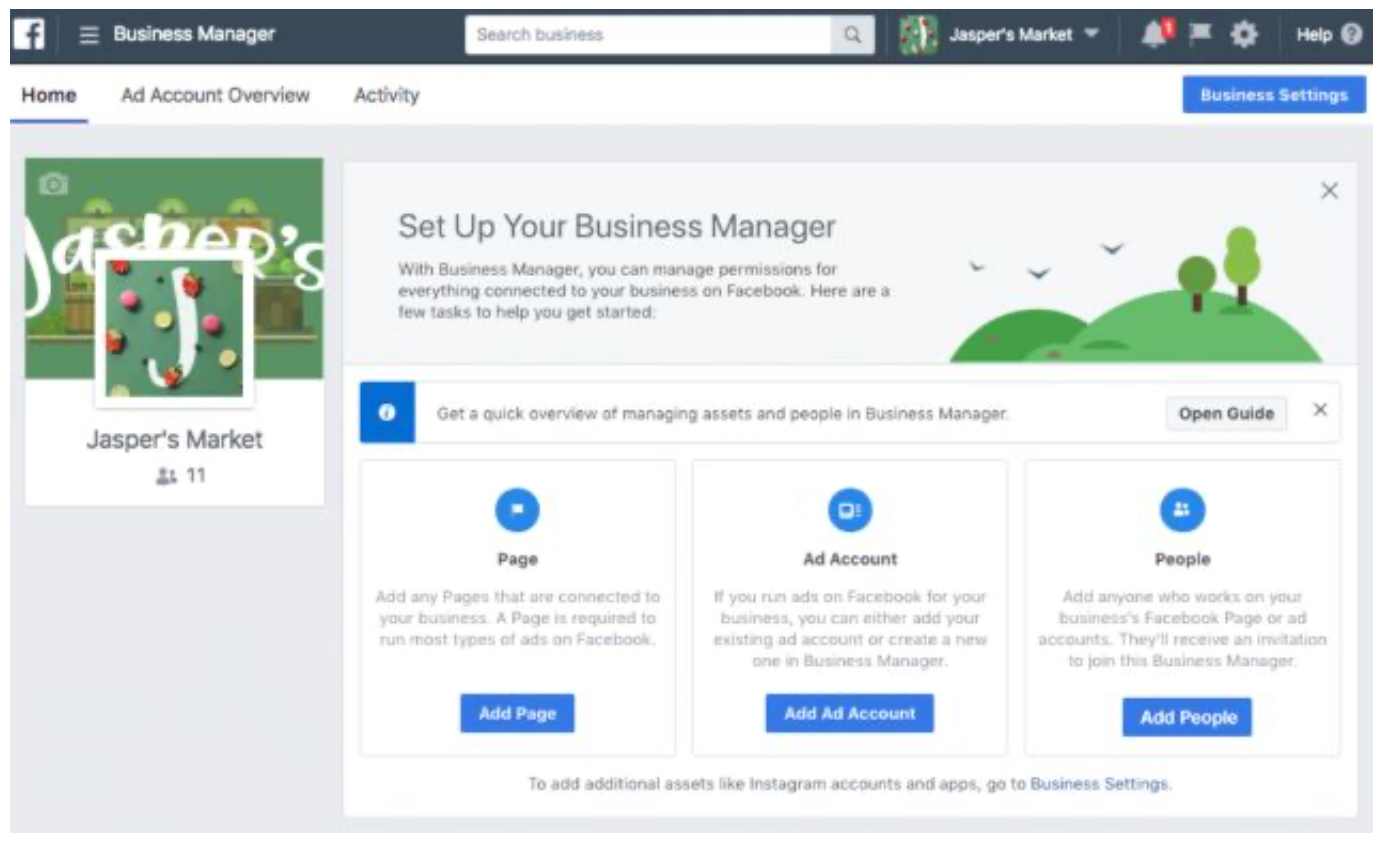
From here you can add a cover photo and logo and your account will be ready to use.
Add pages to Business Manager #
It is essential to have at least one Facebook for your Business Manager.
Click Add Page. You can add a Page you own, request access to someone else’s Page, or create a new one.
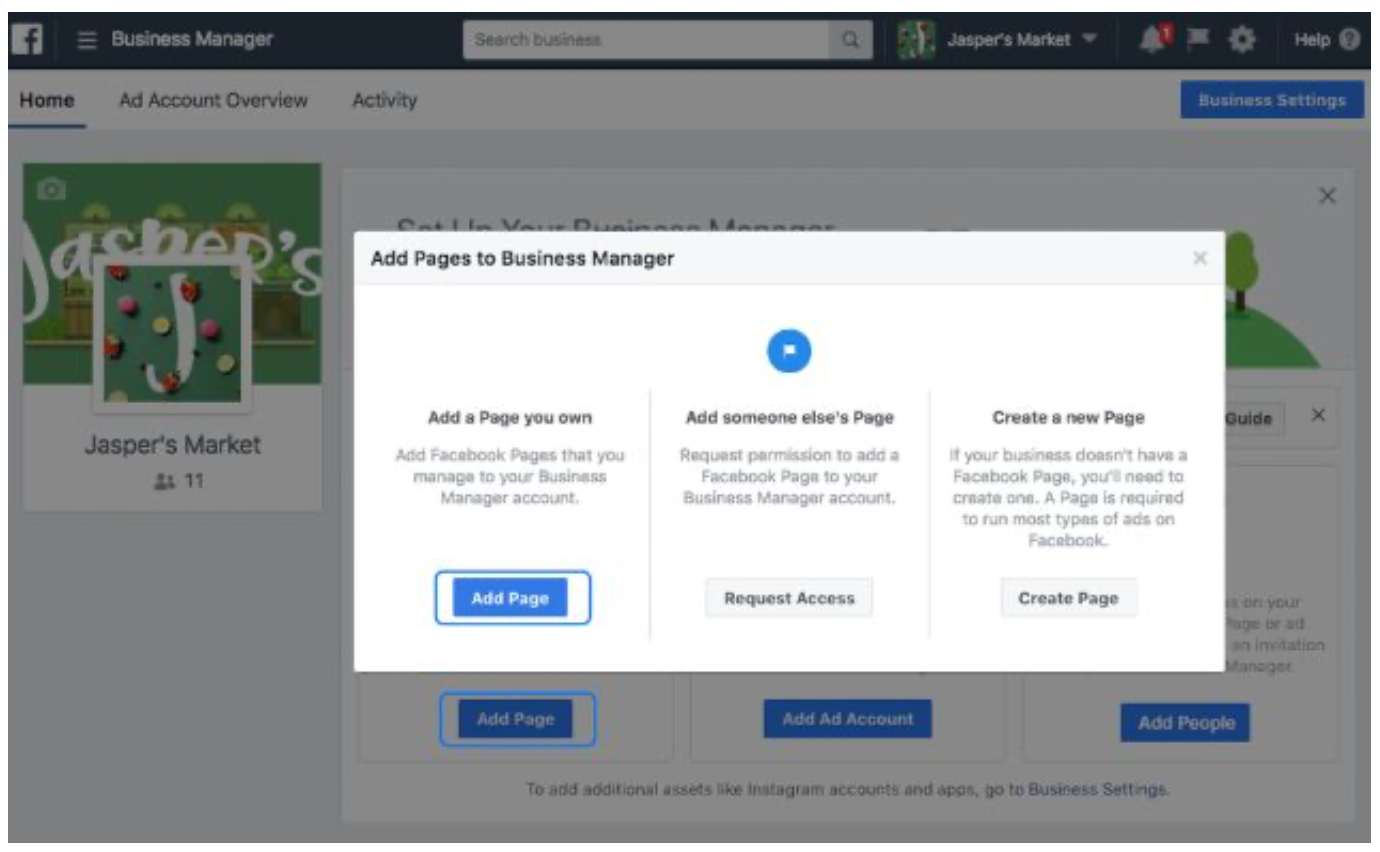
Add the name or URL of your Page. Then click Add Page.
If you’re an Admin on that Page, it will be added to your Business Manager automatically. Otherwise, a request will be sent to the Admin and once accepted, the Page will be added.
You can add additional Pages later by clicking Business Settings.
Add accounts to Business Manager #
Click Add Ad Account.
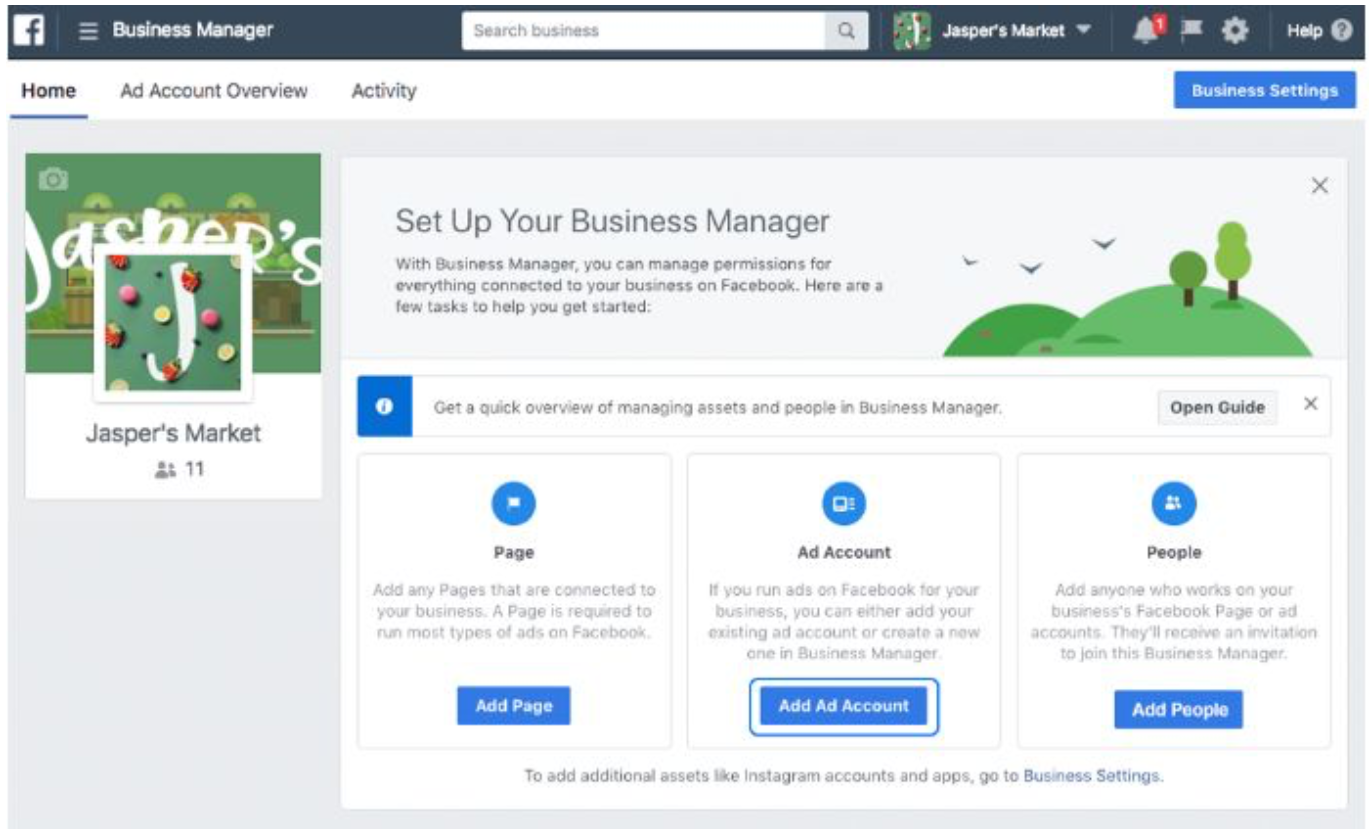
Enter your Ad account ID number, and click Add ad Account.
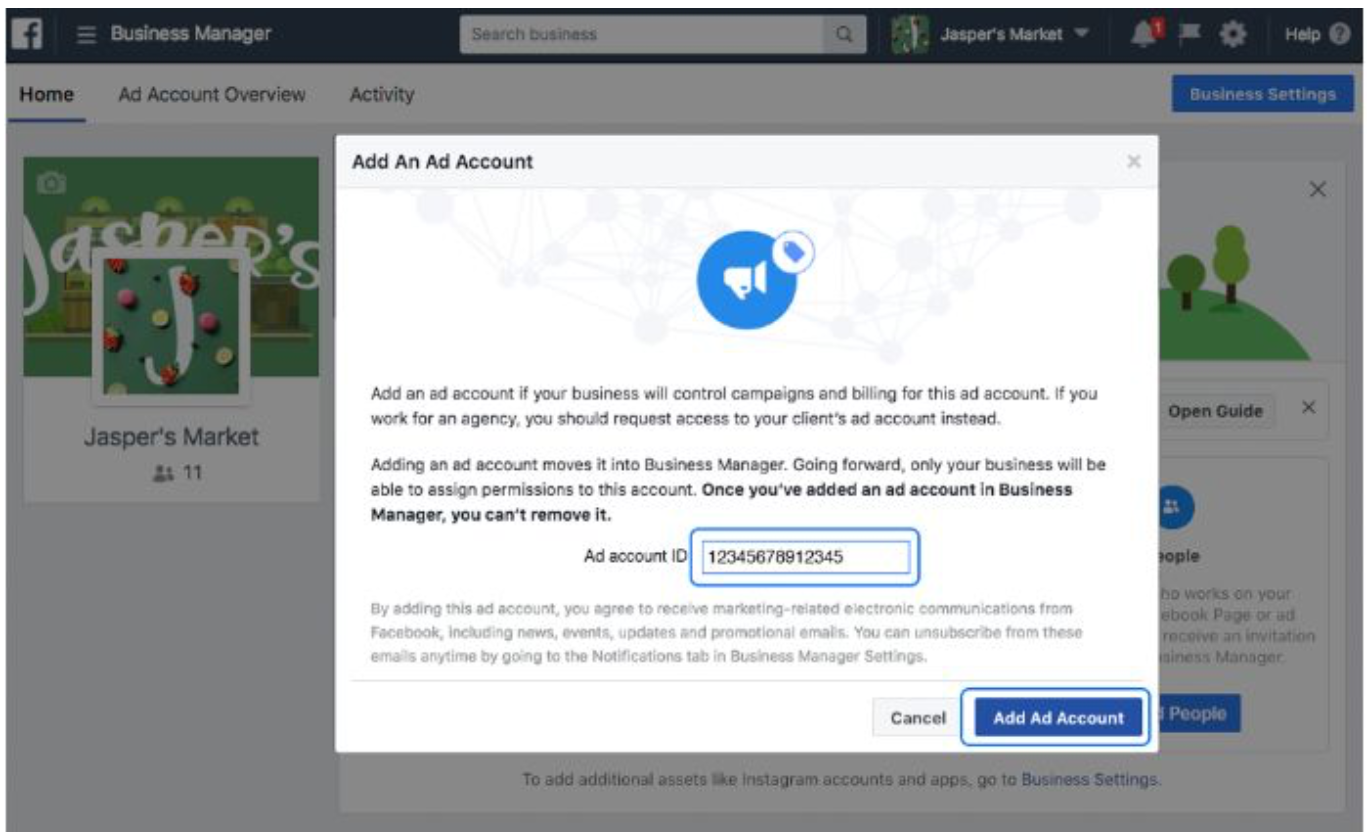
You can add additional ad accounts later by clicking Business Settings.
Add People to Business Manager #
Click Add people
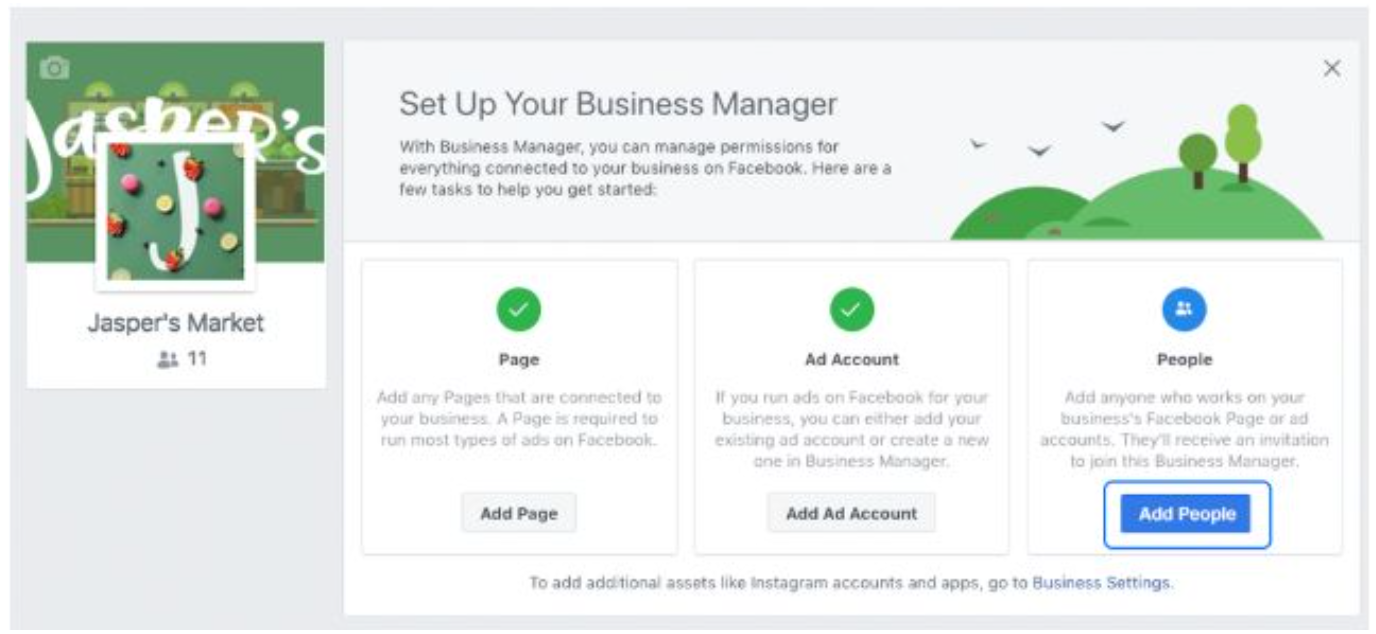
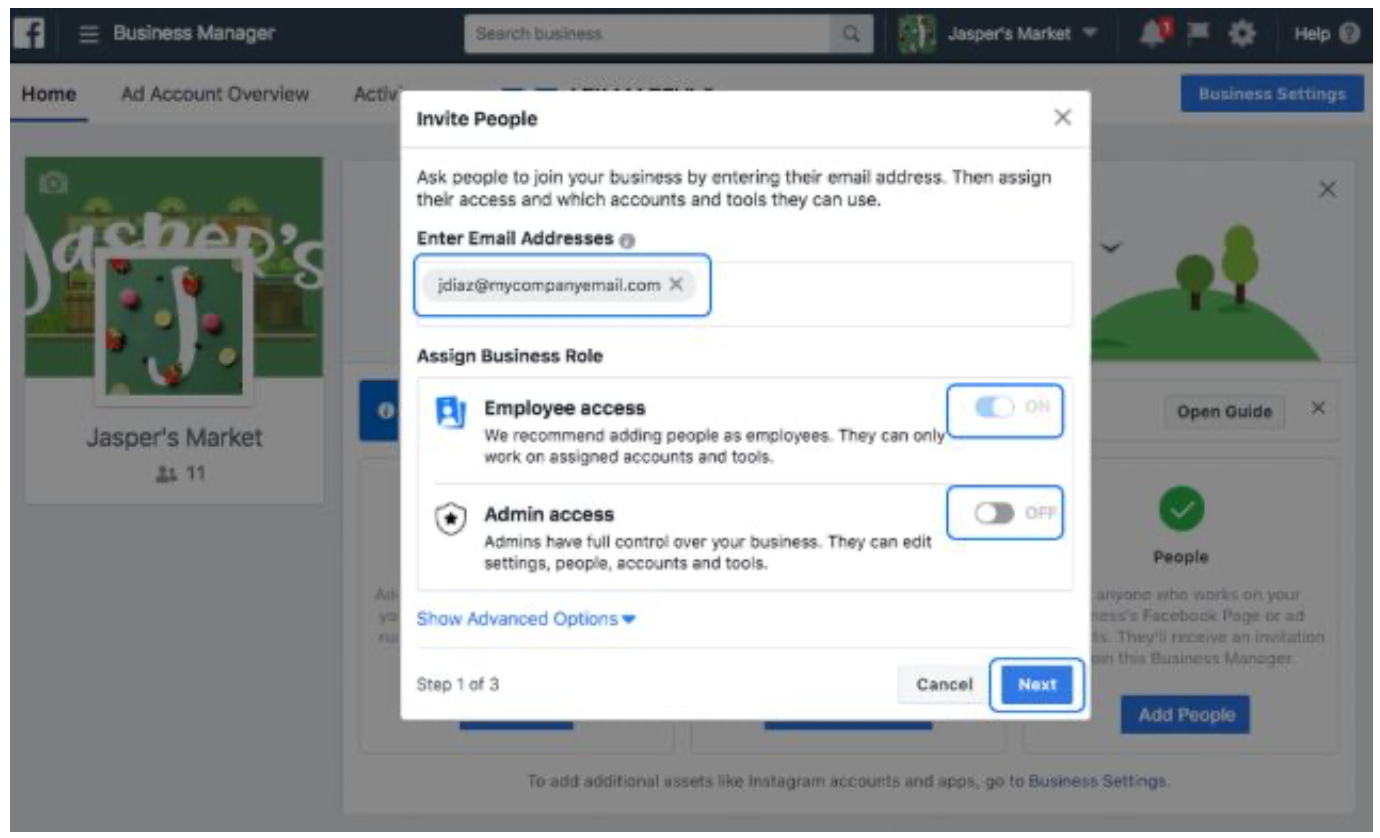
To invite people you need to:
- Enter the email address for each person you want to add.
Assign them a business role
In most cases, I recommend adding people as employees and then assigning specific accounts and tools to them, however, if you want this person to have full access to Business Manager select Admin access.
Click Next.
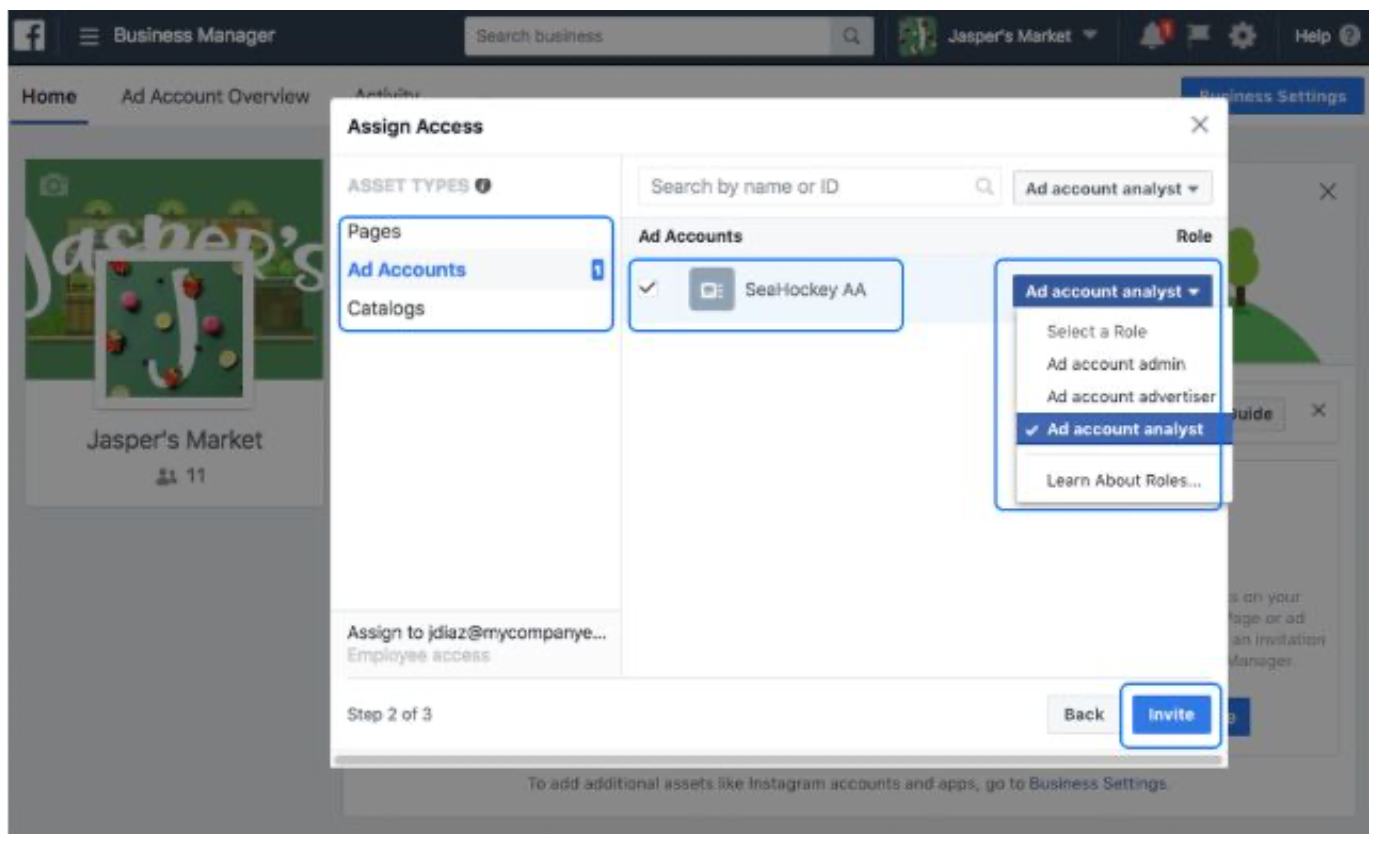
Assign access to Pages, Ad Accounts and Catalogs.
Select the assets you want to assign access to.
Select the Role you want this person to have.
Click Invite
.
This person will receive an email inviting them to the Page, Ad Account or Catalog that you’ve added them to.
Click Add More if you have additional people you want to add, otherwise click Done.
Add partner to Business Manager #
Now you can add your partner, this will allow the partner to manage your accounts including posting to your page and setting up and running campaigns.
It is important to grant PARNER full access to both the Business Manager and Ads Manager. Admin access means we can work to our full capacity on your account.
Don’t worry, because you have created your business manager and ad manager you will remain in full control of the account and be able to grant access or remove access as you desire.
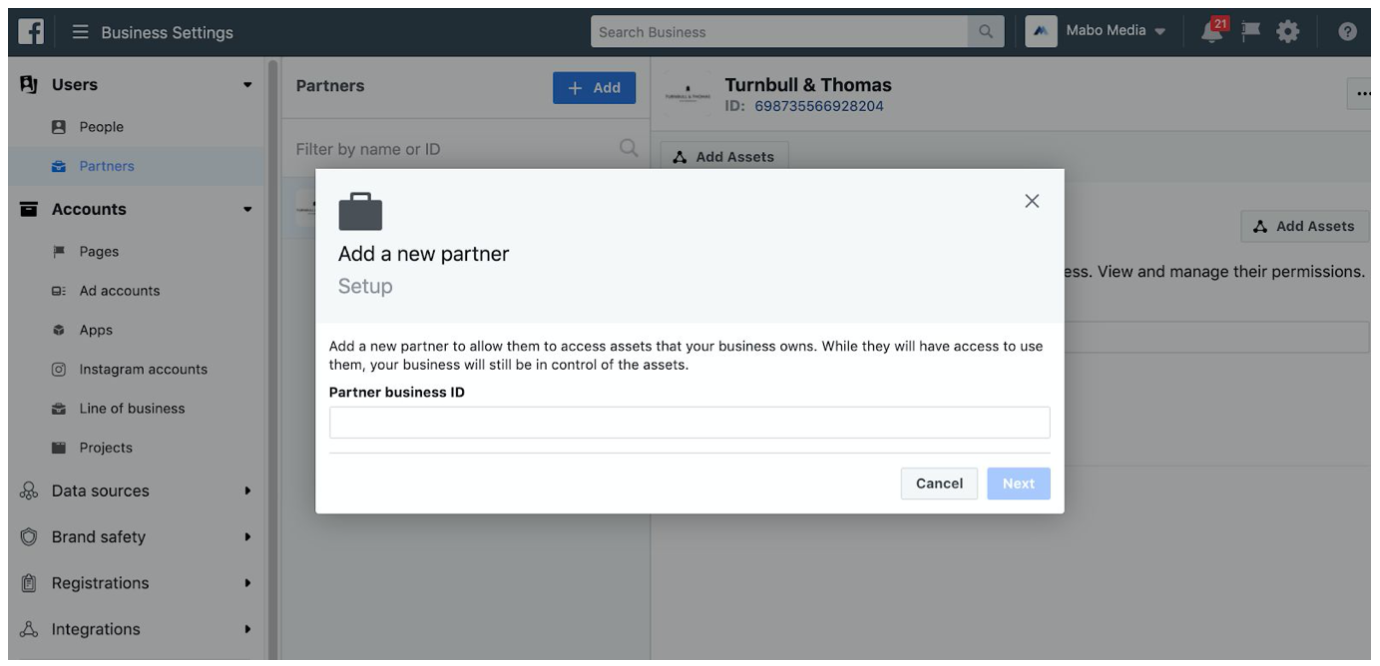
Click Business Settings then click Partners and insert the Parner Business ID.
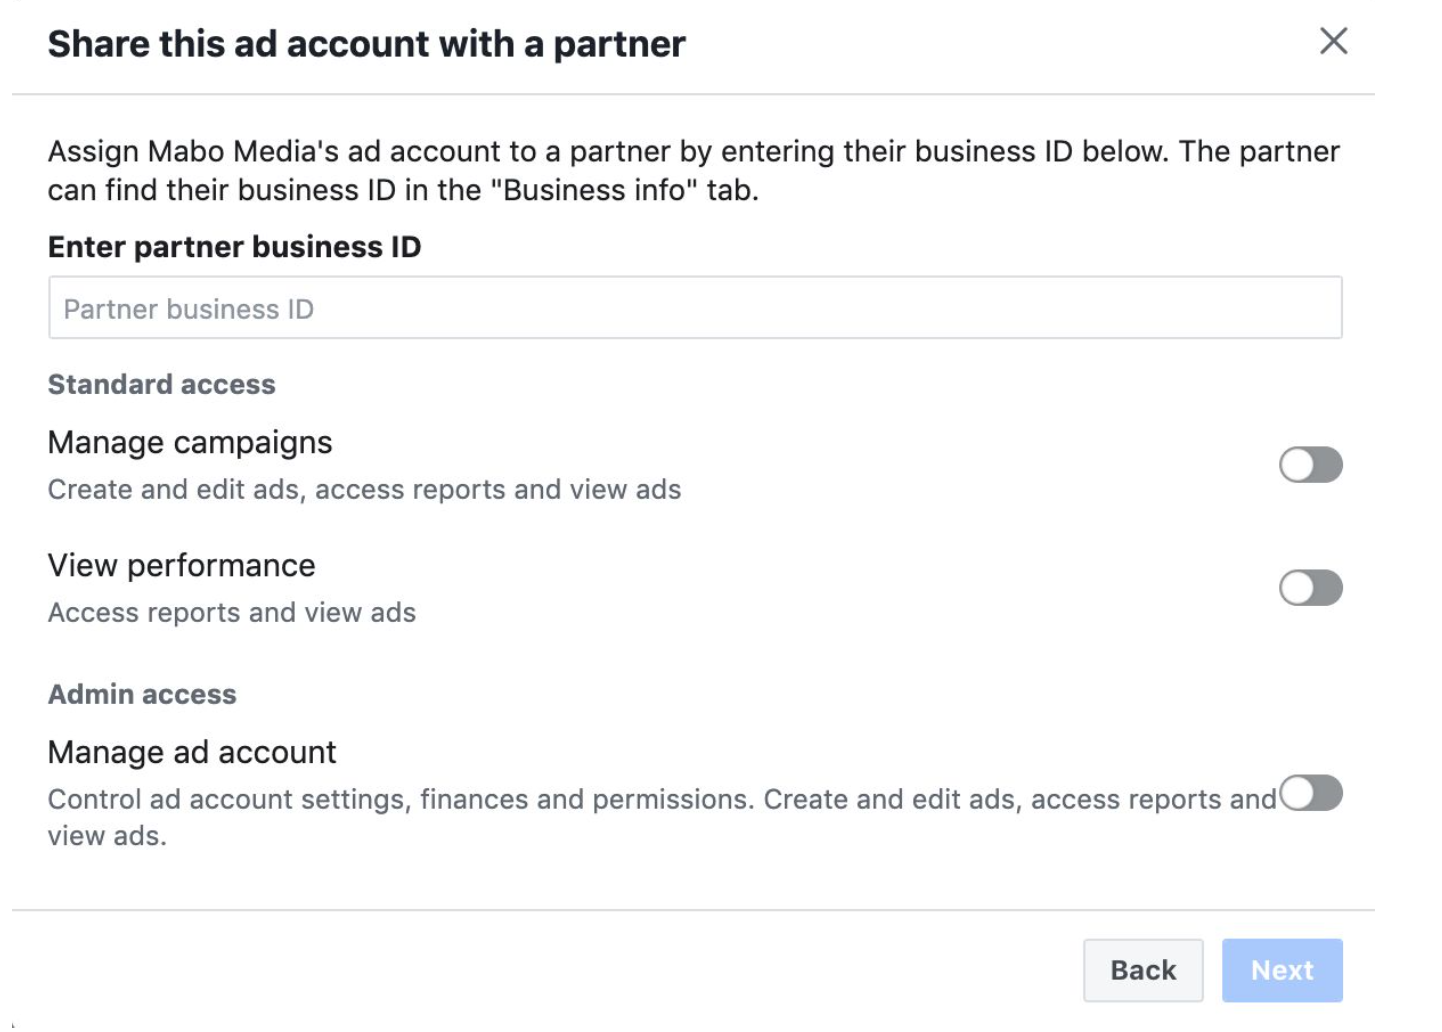
Add Parner to Ads Account #
Click Business Settings
Select Ad Accounts and select your account
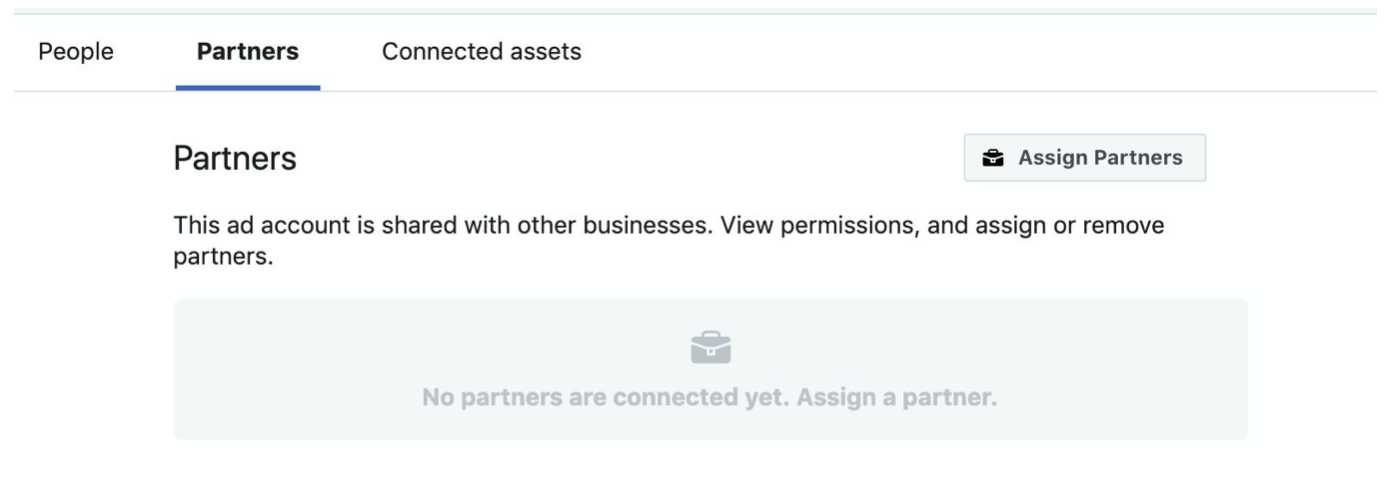
Select Select Assign Partners
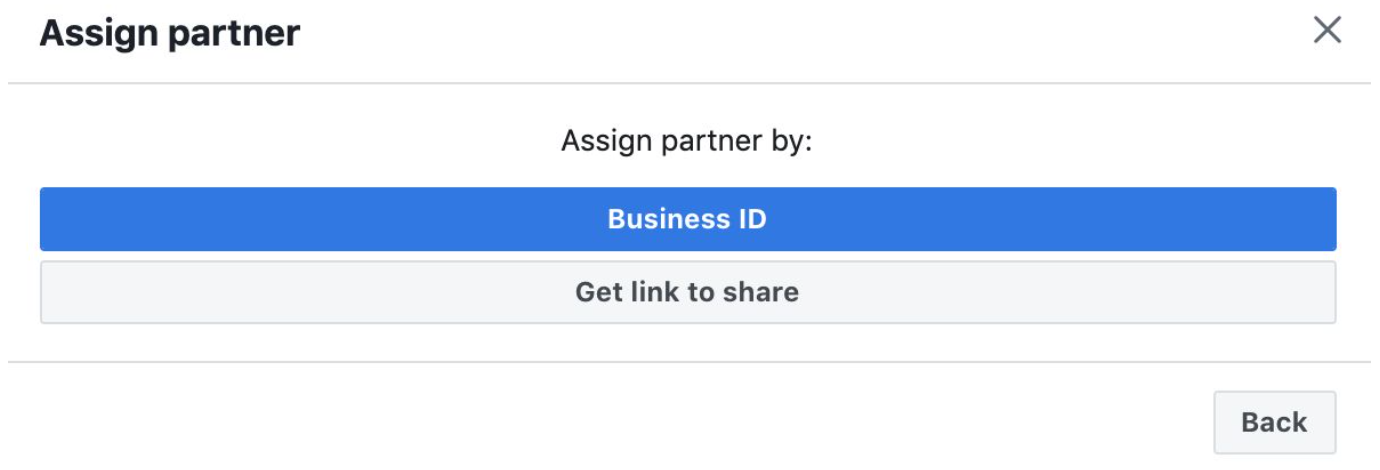
Select Business ID and insert the Parner Business ID
And grant Admin Access and click next.
Assign Partner to Pixel #
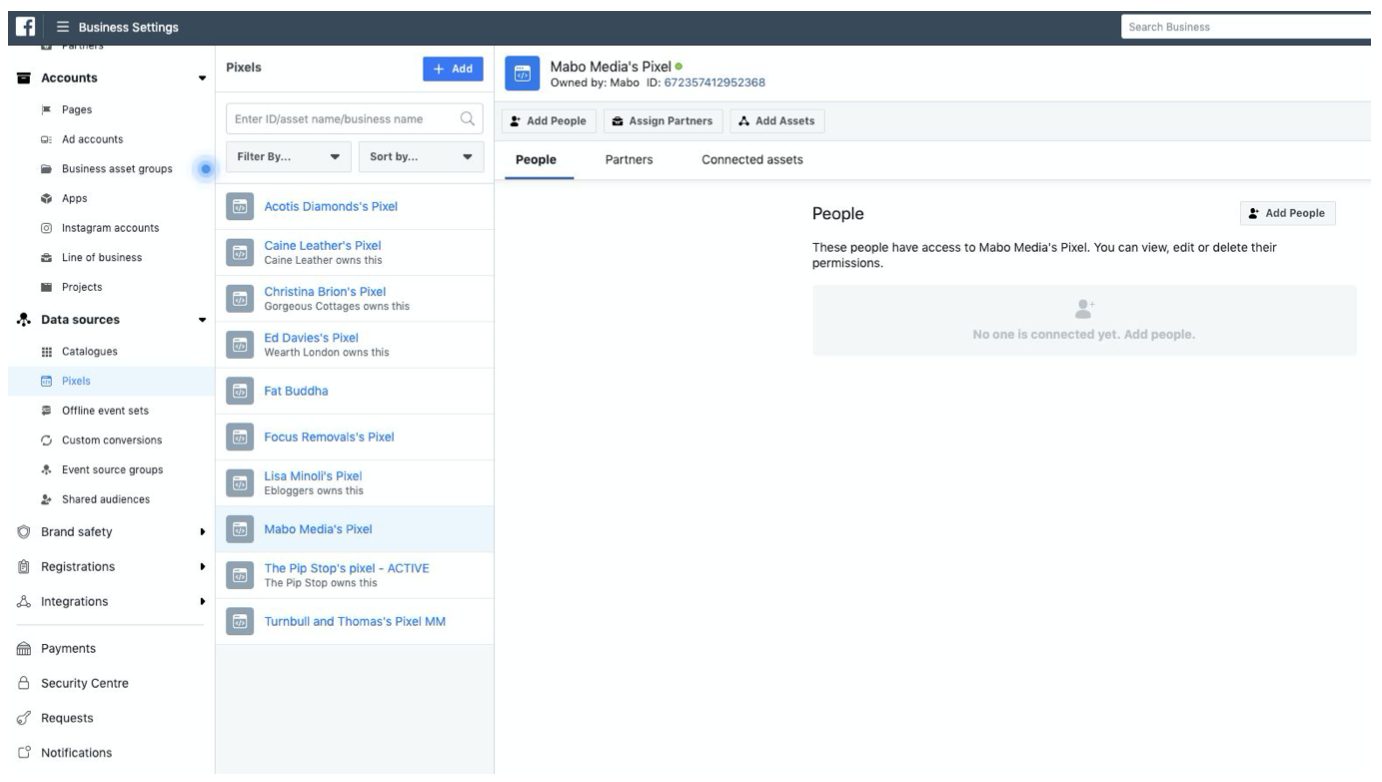
Navigate to the Business settings and click the drop-down, Data Sources. Choose the pixel and from here you can add us as a partner in the same way as the above.
Add Partner to Catalogues #
Adding a partner in your catalog is important as it allows us to dynamically target audiences with products.
This is also found under the Data Sources tab and the process to add a partner is the same as the pixel.
